The first review of a normal scale Gunpla on this new blog of mine, but looking at all the reviews so far, it does seem that I have the tendency for Gunplas that require tons of painting XD
Well, that's not really my intention. I started working on the ones that need more time (painting and letting the parts to dry) so that I could concentrate on those that doesn't later on. Being getting many bigger kits for the last year, and I don't suppose anyone's thinking that I'm just filling up the closet with them ^^;
Anyway, this First Grade Exia is a kit I'm very interested to try since its announcement. I have two FGs before this: Gundam RX-78-2 and Zaku II Mass Productive Type, and both are very interesting kits.
Some of you might have assembled the 1/144 scale SEED and SEED Destiny collection kits before, and you're asking about their differences. I have Astray Red Frame from that series, and I see a huge difference between the two series in terms of their articulation. Even the older FG Gundam RX-78-2 I have is more articulate than Astray Red Frame, even though all its joints are made of hinges and bolts.
FG Exia however, exceeds all of them in terms of articulation. More points of articulation than Astray Red Frame, but uses polycaps for them as compared to no such feature for FG Gundam RX-78-2. It has better color distribution for all its parts as well, but still, all of them are tough kits to paint ^^;
Unlike Season 2, FG Exia was the first Gunpla to be released under Gundam Double O, not the HG version, so it had to pack quite a few specialties for Bandai to put it as the pilot release. Apart from the low price, it's meant for younger modelers where all the parts are easy to remove from their runners (with BB Senshi type of Gate design), and of course, its articulation as well.
I bought this kit for around RM20 (based on my low RAM brain), and Exia's the only one I wanted from the series actually. ^^ Exia is one of my favorite Gundams.


BB Senshi-type of small box.

Colorful 'single-page' assembly guide printed inside the box.

The bonus leaflet is included, featuring the four Gundams with Ptolemaios as their background. This is the picture you'll get if you line up all the four FG boxes. You can also cut out each Gundam from the leaflet to become bookmarks.


All 51 parts including the newly designed polycaps.
Because of the few number of parts, it's safe enough to gather all of them in a pile. You can still differentiate each of them from the colored guide inside the box.


Straight assembly done in less than half an hour. The basic colors are there, but still a lot are missing.

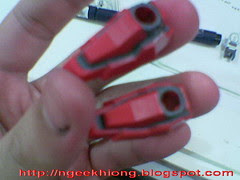
Molded in single pieces, the feet are hollow underneath.
FG Exia only comes with the GN Short and Long Blades as its weapons. Beam sabers/daggers are in as well, but they are either molded together with the rear skirt armor, or have insertion tips into the shoulder armors, so you can't substitute beam part from other Gunplas onto any of them for Exia to wield.
Now, rock 'n' roll time for your Gundam markers. ^^
For the first round of painting, when I haven't started painting the GN Stripes, SEED set is enough actually. All of Exia's basic colors are the conventional colors of Gundam anyway.


Arm: gray for the elbow, GN Vulcan and the hand.
Feet: molded entirely in red, gray and white are the "foreign" colors needed.
Gray goes in first to fill up the tiny slit. Paint spilled can be scratched away, or covered with white later on.


Face: very tiny part but with a few colors in several places.
Red for the edge of mask below the eyes painted first. Toothpick with red paint on the edge is recommended, for very little of the paint is needed. Gray for the cheek after that and finally red for the chin.


Face: When the paints dries, panel liner goes in to fill up the part that surrounds the eyes. Then metallic green for the eyes to complete the task - not from Gundam marker. Since very little is needed, so normal pen you use for your primary school artworks is just right.


Body: white for the collar, GN Drive: its cover (front), the main cone (back) and the little thruster on top of it, gray for the lower part of the GN Drive's base, its grips (back), top part of the front skirt armor, and red for the center panels on the front and rear skirt armors.
Since all these parts are separated from each others and there are more room for you to move around your Gundam markers, whoever goes first isn't much of an issue.
Some simple touch-up for the parts:


The "tooth brush" portion on the tips of the V-Fin are cropped.


The secondary V Fin (?) comes in near triangular yellow part, so the middle part indicated by the red paint is cropped as well.
Extreme caution required, for it's very fragile.


Body completed! ^^ Only the center piece - the front of the GN Drive remains.
Part 2 coming soon, still on painting that is. I will talk about the helmet, the legs and the GN Blades.


3 comments:
hmm i cant really see well how you paint the head and face. i assume you brought a SE phone right? If you are doing a close up shots, make sure you set your camera to 'macro' mode.
Actually those are parts I did when I haven't upgrade to my new phone. No worries, you can still see them (clearer) in Part 2 ^^
NK u need a better camera!!
:p
I can't see much la.. but can see it requires damn alot of painting.
Well, a good practice for painting i suppose :p
Post a Comment