The hardest part of the entire work on HGM 1/550 Dendrobium for me would have to be the 2 figures of Gundam GP03S Stamen and Gerbera Tetra.
Same as the figures of Stamen (a different one with rifle and shield) and Zaku II F2 included for Neue Ziel from the same plamo series, the parts are made of soft plastic, which is extremely hard for panel-liner ink to stick on. That's the exact reason why I only did Stamen for that kit, while Zaku II F2 still remains as uncut parts on its runner. ^^;
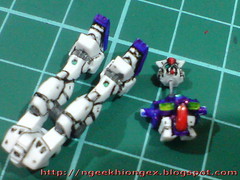
For this kit however, Stamen is compulsory for Dendrobium, since he would be the "pilot". Gerbera Tetra is optional, but I decided to paint it because I like this MS very much. ^^ Also, it does have its crazy moment with the mobile armor, and it's possible (sort of) to realize that battle scene when this kit is done.
As the title implies, all the work was done over a 3-night span. Apart from the human factor (tiredness from the day reduces energy to work on delicate parts at night), more time given for the paint to completely dry off is another.
At least each figure is separated into different parts, making the work somewhat less troublesome. ^^
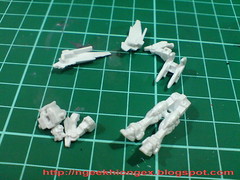
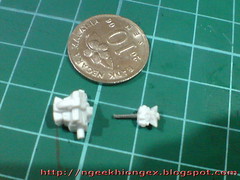
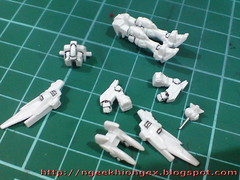
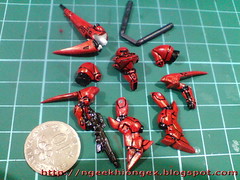
Parts for Stamen.

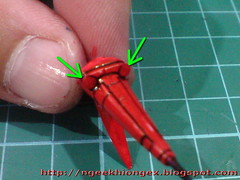
The head is fixed to the body, making the neck area very difficult to paint.
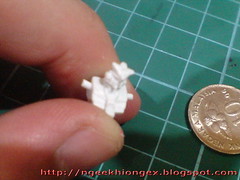
Decided to cut it off for easier treatment.
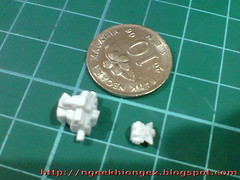
The good thing about the parts being made in soft plastic - they are very easy to cut. ^^
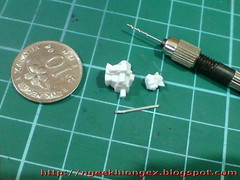
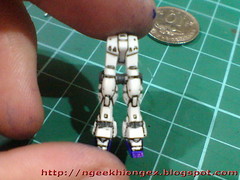
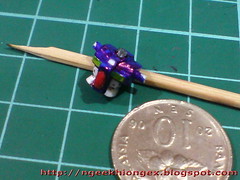
The new neck joint installed is a short segment from a staple (larger type).
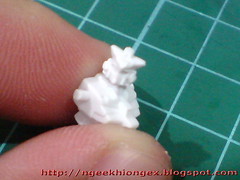
Now the head can turn to the left and right. ^^
This part of the work feels a lot like the figure of Iron Mask from MG Gundam F91. ^^
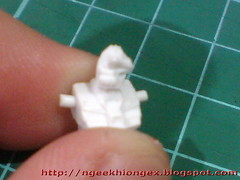
Panel-lined the border of the parts that require painting to make the various spots more visible for the work.
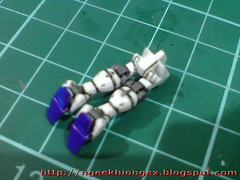
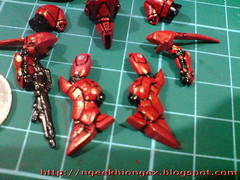
Gundam Marker Gray for the joints; normal blue marker for the shoes.
Gundam Marker works well on this type of soft plastic, that's a relief. ^^

Gundam Marker Gray for the elbow and thruster, normal red marker for the thruster nozzle.
Gundam Marker Yellow for the chest vents; normal blue and red marker for the rest of the parts.
Metallic green pen used to paint the sensor units on the legs, chest and the eyes.
Using normal marker on these soft plastic parts is something I got from the experience of painting the figure of Stamen from HGM 1/550 Neue Ziel. The statement of "dry on all types of surface" is really no bluff for these markers that you can easily get from any stationery store. ^^ However, you do get that very glossy finishing on the parts painted, which might not be preferable by some.
Gundam Marker works just as great on such material, as I found out from the paint job on Stamen. That's a good thing.
The work on Gerbera Tetra should be a little bit easier I suppose, given that all the parts are in either red or black.
Actually, based on the color from the old 1/144 Gerbera Tetra plamo kit released by Bandai, the main color should be pink instead. The manual of Dendrobium showed the figure to be in bright red. So I suppose red should be fine as well. ^^
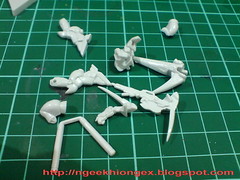

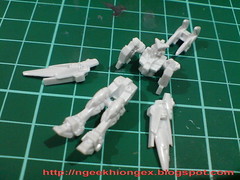
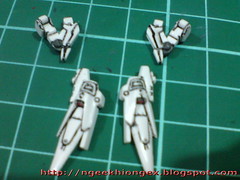
Parts for Gerbera Tetra.
Comes with a stand as well.


Gundam Marker Red first, then normal black marker after that for the rifle and thruster.

The lines showing the border of the thrusters are self-defined, since there's no details molded for this part.


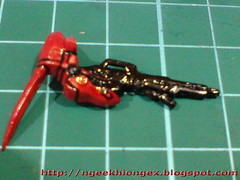
Very glossy parts. ^^
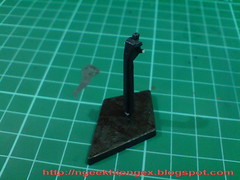
The display stand is painted with Gundam Marker Black.
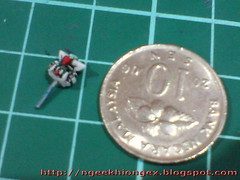
Done and done. ^^
Apart from painting, the parts require glue to fit together for the final assembly as well, which is a feature you seldom get from Gunpla kits produced by Bandai since a long time ago. I suppose the labor required on these figures may have some influence on this plamo series being less favorable than the 1/400 Gundam Collection series as mentioned in Part 1. The figures from the latter not only come fully painted, but are larger in size because of their scale as well. But again, that's just my speculation.
Last part of the entire work on Dendrobium in the next posting. ^^


7 comments:
Wow! I completely understand why it would take you 3 nights of work! I still remember your iron mask! It was so funny! It looked like he was peeing his pants since the F91 was so close thanks to the pose you gave him. Impossible though since he says that he doesn't feel emotion since he has the mask. That is if its really the effect of having that mask.
salute ur skills on painting such small models. for me i only did once which is for 1 of my MG model pilots and its not easy. lol
oh my... painting the face of 1/550 scale Stamen... I had troubels painting eyes of SD Kanpei but this...
Sir! I salute your effort and look closely at great effects :D hope to see more soon
I remember painting on one of those SD gashapon soft plastic. Gundam marker is fine but the gold I use never dries! >.<
Good work and patience on the miniature gundams NK!
Can I send you my MG pilots for a coat of paint then ;)
This sure requires a lot of patience and precision to paint on the 1/400 mobile suits! Do you use toothpick to get more precise on the details? I've been wondering how to paint my various 1/144 crew/soldiers etc for some time now. ^^;
>>Dyne46
Thanks very much. The cutting-off-the-head part for Stamen is a bit of follow-up from the work on Iron Mask. Because the size of the Gundam figure is bigger than a 1/100 scale pilot figure, I could put in a tiny pin for the joint, but the idea of the neck is the same.
>>sl619
Painting a small figure can be quite fun after dealing with the many larger parts of an MG kit. ^^
>>Aulon
Painting the eyes of a BB Senshi kit is very commendable itself. It's not easy to get the details of the pupil. Very good work to you ^^ Normally I just use the foil sticker included.
>>Chris
Probably because the chemical material of the gold marker is different from the other markers. I notice that the ink will suffer from the result of oxidization as well, while the others are fine with that. Will take note of this in future work. Thank you very much for the comment sir.
>>madmoz
Thanks. In before we establish a proper pricing eh? Just kidding. XD
>>Q
Toothpick is not used this time (quite a surprise for myself as well). Because the base color is white, I paint directly onto the parts using the markers. Whenever there was spill of color, I just scratch it off with a knife. The paint came off much easily than that on normal Gunpla plastic actually. So I didn't bother using toothpick.
Painting 1/144 scale soldier figures would be much harder than 1/100 scale ones because of the much smaller size. Good luck to you on that. ^^
Post a Comment