Saturday, February 28, 2009

HG 1/144 Tieren Ground Type Part 1

This is no Zaku, boy! No Zaku!


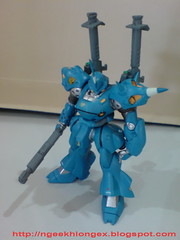
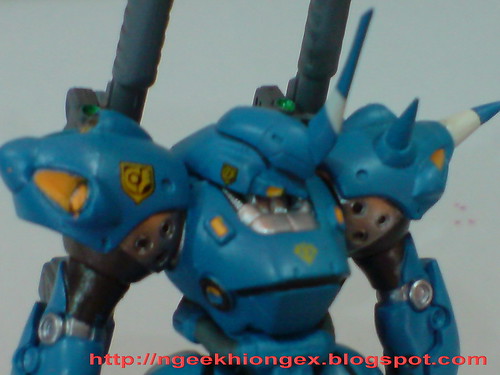
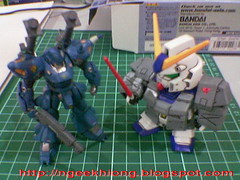
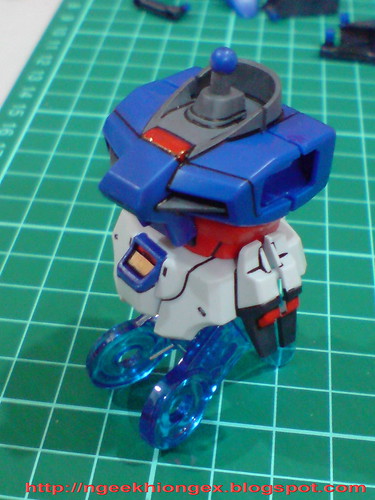
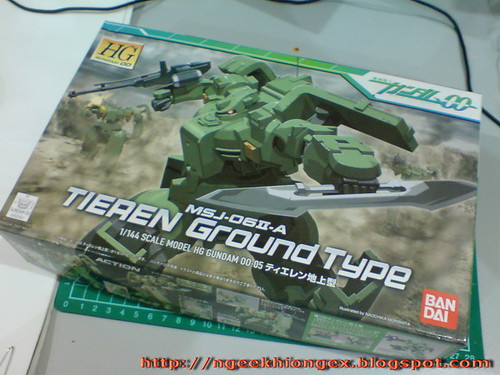
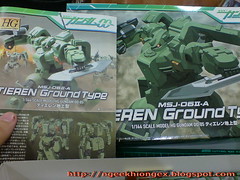
But no matter how you see it, be its head design, shoulder shield, color scheme, or even its designation code, a very strong connection to Zaku II is definitely there ^^

I love Tieren very much. It's definitely my favorite grunt unit from Gundam Double O, both season 1 and 2. I love the very realistic design of Tieren. Instead of an MS in the world of Gundam, Tieren looks like the evolution of modern day tank to me: the size is mainly on the body, very well armored, may be slow, but highly reliable (at least I feel so).

I think if there's going to be MS coming up 300 years from now, it would definitely be looking like Tieren.

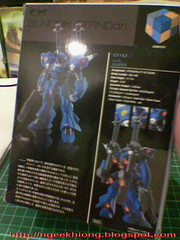
As for this HG, its overall design is just plain awesome. I'll save my breath on that first, to avoid talking about the completed model at the beginning of this review ^^;


Like the other HGs for Gundam Double O, action pose on the box art can be mimicked completely by the actual model, plus even more too ^^

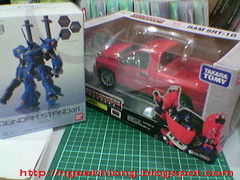
Bought this HG some time around the beginning of last year, and it's the same case with my BB Senshi Destiny. I started working on a few parts on this Tieren but never continue for a long time. The (continuation) work on the previous kits reviewed made me want to do the same for Tieren as well.


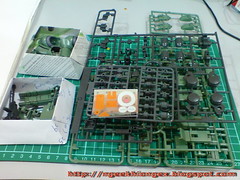
Four runners including the polycap set. The two small paper trays on the left contain parts I've painted.


A closer look on the runners of this HG reveal plenty of hints for further variations to be released.


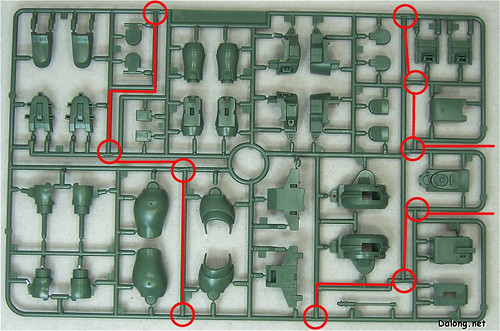
Runner A: Parts in the middle are common for all Tierens, mainly for the body and forearm.


Runner B: Changes to the weapons seemed to be planned, but all the variations released after this come with the Smooth-bore Gun and Carbon Blade (for space use Tieren as well). Changes like the blades for the Smooth-bore Gun are appended onto the left portion of the three instead.


Runner C: Total wild card, containing all the distinctive parts for a particular Tieren. Other variations use Runner D, E, or F.

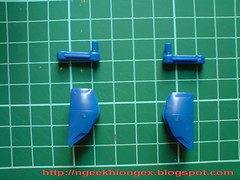
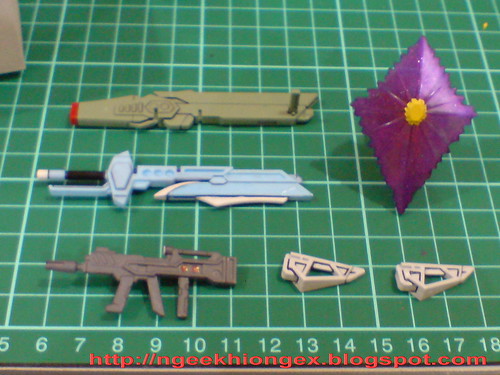
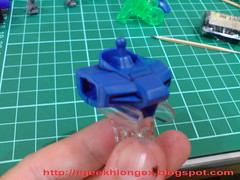
As mentioned earlier on, I've started working on a few parts, mainly on painting:


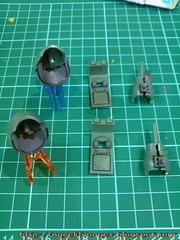
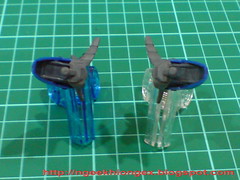
Mecha part for the thigh, shoulder shield and upper arm: light green to gray (SEED Basic Set). I was pondering between gray and dark gray actually, to match the color of the other parts from Runner B. Dark gray would seem like a better color, but when I bought Tieren Taozi and Tieren Space Commander Type, I see the color of their respective Runner B to be even darker. So I changed my mind to using normal gray for Tieren instead. Dark gray would be more proper for the other two Tieren mentioned.

Also, you can actually get a darker version of the normal gray, but still lighter than Dark Gray, if you purposely skip some effort in shaking the marker prior to using it on the model ;)

On the separate note, the same parts on the larger 1/100 scale version are molded with the same 'flaw' of missing the gray. While there are so much details being poured onto the 1/100 scale version, the design of the parts is all the same. ^^; Then again, I won't call it a definite weakness because the paint job required is really optional.


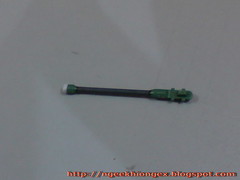
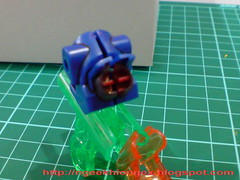
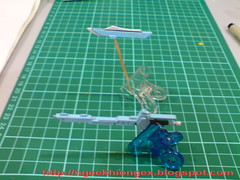
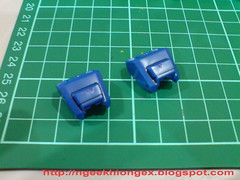
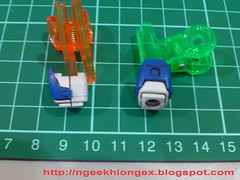
Antenna on the backpack, Carbon Blade and magazine for the Smooth-bore Gun:
Antenna: gray for the body, and white for the tip.

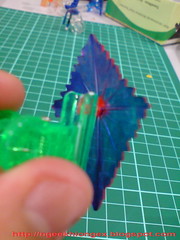
Carbon Blade: black to light blue for the handle. I use Light Blue for SEED Destiny Vol. 1 Set as mentioned in FG Exia Part 3. The whole blade is in dark gray, but I just painted one layer of light blue, which is not enough to cover the base color. Considering that the blade can be pinned to the hand when carried or mounted onto the rear skirt armor, quite tightly as well, more layers of paint increase the risks of the the paint being scratched off in the future. And then you would paint another layer of light blue to cover the scratches and it becomes thicker, and more prone to ugly scratches.

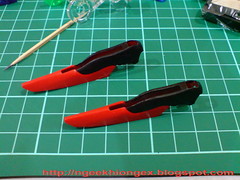
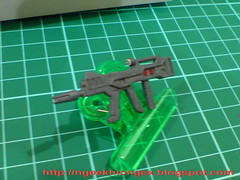
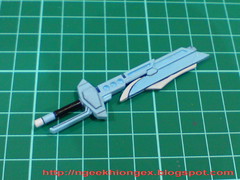
Magazine for the Smooth-bore Gun: White for the cap on both ends. One end is a separate part, so no worries on spill over of the paint. The other part is molded together with the body of the magazine (or to say it the other way round is the same), so unless you have masking tape, you'll inevitably need to scratch off some spilled over paint from the body in the end.

Since it's painting white on black base color, I did a few layers to cover up the base color.


I used to think that it's a targeting sensor, because it seems a bit too small as the magazine of the gun. The manual from the 1/100 scale release proved otherwise.

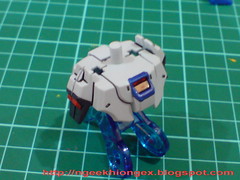
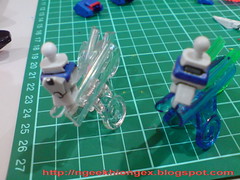
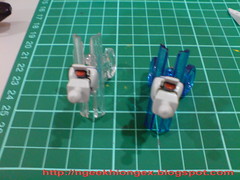
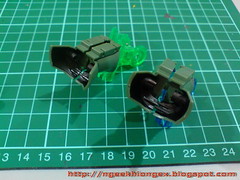
Interior of the armors: Painted black for the interior of almost all the armors to give them more depth, to make them look like they are made of multiple layers of materials.


Panel-lined all the parts, with many still on their runners.


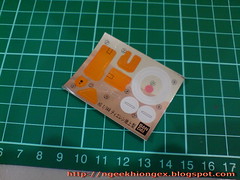
Foil stickers will be used for this HG - orange-colored ones for the components on the chest.


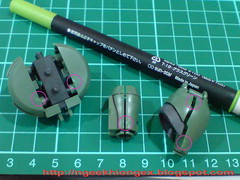
Green marker used to cover up the nub marks on all the green parts of Tieren.


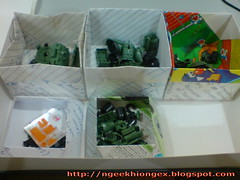
All the parts separated in different paper trays for the final assembly ^^

Will be working on the eye for the next review ^^

Images of the runners and mecha design of the Smooth-bore Gun are from Dalong Dotnet.

Friday, February 27, 2009

BB Senshi Destiny Part 3

Fewer parts, much more work

Only if you're as picky as me though ^^;

[Backpack]


Dark gray for the exterior of the thrusters, red for the interior. The later goes first, and any spill over can be covered all the color on the outside.

[Backpack Components]


Total makeover for the anti ship sword and beam launcher's mount racks on the backpack, from total blue to total dark gray (from Gundam Marker SEED set).

The top portion of the wings are painted in black, and the painting turns out to be a bit uneven. Each one of them are quite a big area to paint and curvy edges are not too friendly to your marker. ^^; Unlike most other parts which would look better with more layers of painting applied, the wing is exactly the other way round. The more you do it, the clearer the mistake is going to be. I'll just leave it the way it is right now.

Part of the interior, which form the top portion painted in black as above should be in the same color as well. I skipped that though, as it's a little to hard to paint ^^;

[Beam Shield]

Here is the most interesting part to paint. How does one turn a part from clear pink to clear blue? ^^;

Like the color I used on the mono-eye camera of Zeon MGs in the past, blue permanent marker comes to my mind immediately when I was thinking about the beam shield. Sure it can retain the transparent quality of the shield, but the shield is a significantly larger part to paint as compared to mono-eye camera, you really don't need to try on any part to see those ugly trails and layers to be appearing. ^^; An 'X' to the idea. ^^;

Gundam Marker then?

Definitely better than normal marker for such a large area, but the transparent quality of the beam shield would be compromised. Even those glittering particles inside the shield would be gone.

Well, if you can't get all your cool ideas fulfilled, realizing half of them aren't too bad right?

Gundam Marker go!


The color used is Metallic Blue from BB Senshi Sangokuden set.


Painted the back of the shield only, as well as those "staircase" on the side on the shield later on.

As a result, the shield is not in clear blue/blue, but purple instead. But from certain perspective, you can see the effect of Metallic blue from the layer of paint on the back. The transparent quality is gone D: but the glittering particles inside the part are even more visible now, since the blue painted sort of provided a backdrop for all of them. Shiny too ^^

Give and take eh? ^^

[Beam Rifle]


All white to all gray, leaving the targeting scope. Plus two tiny spots in red on either sides of the rifle's body.

[Anti-ship Sword]

Light blue from SEED Destiny Set Vol. 1. Actually, this color should go in first, followed by black for the handle, and white for the edge of the sword. However, prior to completing the whole component, I was a bit reluctant to paint the body in light blue, for a lot of the paint is required. "Leaving it in blue is OK I think." And I painted the black and white part.

After a while, I just submit to my own pressure of following the official color. ^^;


For the two edges of the sword, silver is not a bad color. but I don't suppose I want that color for my MG Destiny, so I go for white for to be consistent with the same part from the MG version.

[Beam Launcher]


Just red for the "cap".


All the completed weapons.

Done with the painting? Nope. Still a bit of touch up needed. Stayed tuned for Part 4. ^^

Thursday, February 26, 2009

FW Gundam STANDart Kampfer

The last legacy of my Nokia 6600

My third Kampfer after its MG, HGUC (yet to be assembled) and BB Senshi version (yet to be assembled as well). This is also the first Gundam gashapon I purchased as well. ^^

Kampfer is one of the four figures in Vol. 3 of the series, and is the only one I'm interested in ^^


Got it the same time as Binaltech Convoy, and unlike that Transformers action figure, I didn't have much intention of buying it in the first place, but as I walked around the store after seeing it, the box kept on flashing before my eyes, and the pressure of leaving the store without him was a bit too much for me at that moment.

So, even though I knew well that it was expensive to purchase this gashapon at that store, I paid for it anyway. I stuck a good deal for Convoy, but lost out on STANDart Kampfer. Maybe I can call it square with that store then? ^^;


As the name suggests, Fusion Works' Gundam STANDart series features various MSs in merely standing position, most of the time, with all their weapons loaded - full arms mode.

That also means articulation is very minimum for these STANDart figures. And I said minimum, not zero. ^^

I like the idea of MSs in just plain standing pose very well. For my own Gunplas, no matter how well articulated they are, they always end up with the "standing-just-like-that" pose in my collection, in the standby mode as some would call it. Somehow I feel that that's the best pose for an MS, especially Zeon MSs. Just personal preference of course ^^

This STANDart figure stands 9cm tall (from feet to the tip of the blade antenna) and 10cm when equipped with the Giant Baz. The main attraction for me is the paint scheme and the details.


Painted in lighter blue than shown on the box art.


Nicely printed markings of Zeon and the Cyclops Team. Warning markings can be seen on either front leg armor as well.


Best part: yellow and silver inside all the thrusters on the shoulders, backpack and legs. The tiny thrusters on the body and head are painted as well, without the silver interior though.

Many parts on this STANDart Kampfer, including all the joints, interior of all the major thrusters, the neck area, hands, part of the feet armor and the shotgun are painted in silver, and they turn out to be really cool. ^^ Not sure if I want to use the same color scheme for my HGUC though ^^;

As mentioned above, articulation is minimum, not zero, because a few parts on Kampfer are movable. The head, shoulder, upper arm, wrist and mount rack for the Giant Baz are movable. Better than nothing, but not much point either, since his body is pretty much immobile completely. I tried turning the pelvis joints, but it almost seemed as if the whole leg is going to break off at that critical joint, so I didn't pursue on that.


With BB Senshi Gundam NT-1, definitely not suitable to be displayed together. XD


Another advantage: doesn't require much space in my overpopulated display cabinet ^^;

STANDart Kampfer is definitely not something you would play around with now and then. "Standing-just-like-that" is the best thing he can do. XD If you like gashapon or trading figures from the mecha series, or happens to be a loyal supporter of Zeon, STANDart Kampfer is for you. ^^

View full gallery:

FW Gundam STANDart Kampfer FW Gundam STANDart Kampfer

Wednesday, February 25, 2009

BB Senshi Destiny Part 2

Sticker or no sticker, that's the question

Some serious painting after the little beginning in Part 1. Today we talk about the body, or rather, the "front view" of the entire model first ^^

[Body]


Gray for the chest verniers, neck area and collar. A bit of red for a spot at the end of the neck area. Nothing too fancy like those golden stripe and ornaments on Shiba-I Sazabi and Koumei ReGZ, but I'm thinking of whether to paint the light blue stripes on the chest, or to just use the foil sticker provided. Since I'll be using light blue from Gundam Marker SEED Destiny Vol. 1 set for the anti ship sword, foil sticker for the chest would make the two parts look a bit inconsistent.

And since the chest area is probably the only part with such big pieces of foil sticker (there are two of them, one on either side of the chest), I wonder how the feel of the overall model would be like with those foil stickers ^^

On the other hand, since I have been using Gundam Marker to substitute as many sticker as possible in the past, I'm very tempted to return to the old days when I have no Gundam Marker, when foil sticker totally rules XD

I do have this sort of "unexplainable" temptations and behaviors in Gunpla-ing now and then - sometimes for five minutes only, sometimes days. XD

[Skirt Armor]


Not much problem for the skirt armor as well, since the parts are molded in white. Red goes first for the verniers inside the side skirt armors, and all the spill over can be conveniently covered up by dark gray for the rest of the part later on.

I was thinking of painting the whole part on top of the crotch in blue and to use the red foil sticker for the interior later on. The simplest way I think, and since the part is small, it won't matter much anyway. But before I get to think much about it, I painted the part already, continued from the verniers ^^;

Of course I can still follow my plan and use the red foil sticker, but the color turns out well, so I don't really want to put it to waste by covering it up with foil sticker.

It's a little case of "Oops!" of me ^^;


Still need to trim some excessive paints here and there

[Shoulder Armor]


A bit of red of the edge of the beam boomerangs' storage rack.

Before moving on, you can clearly see the nub marks on the body and shoulder armors. I call them wounds, because they are the marks left behind when you clear off the gates from the parts. Almost all of these wounds leave white spots. You can avoid them as much as possible if you sand/file the parts properly. But I have have no sand paper for Gunpla use, and I never use any before actually. Might be surprising for many ^^;

My way is to use a matching color, be it from Gundam Marker, permanent marker, panel liner, highlighter or any pens suitable for the color, and paint the wound with it. When the color dries a little, wipe the part clean, and a little bit of the color used will remain in the wound, thus covering the white nubs.

I use blue permanent marker for the wounds you see in the pictures above, and the color is darker than the parts painted on. ^^; That's a good thing actually, because then you can clean it off more, but the color will not diminish so much until you get the white 'bottom' anymore. Some color would be gone the moment you clean it off, and you have to paint and clean it all over again.

[Shoulder Joint]


Blue to gray.

Was thinking of leaving it in its original color actually, but then I feel that it should be considered as part of its interior, so the common color for that, gray is used. Since the body and shoulder armor are in blue, gray would be able to distinguish the shoulder joint than those two parts.

[Forearm]


Blue to white.

The upper part, the one with the shield is molded completely in blue, so white goes in to difference between the blue shield and white forearm. A few layers needed as usual, to cover up the blue base color.

I think I'm too used to painting white on dark-colored parts from my experience with BB Senshi Sangokuden Koumei ReGZ, I don't feel annoyed for parts like this anymore. That's really a good thing XD

[Beam Shield Generator]


Yellow for all of them. One or two extra layers are needed to completely cover the blue base color.

[Hand]


Painted gray for the entire hand, both the spread palms and hands. For the spread palm, since it needs to be in a forward position, the knuckle armor is designed to be wide at the base to allow the palm to be lifted more. That leaves a large piece of connector to the palm. Painted dark gray (from SEED Basic Set) as seen in the picture above

[Leg]


Each leg is molded as a single part, so there exists a hollow interior, which I dislike very much (for all Gunplas).
They are going to be annoyingly visible in almost every poses the model makes :(

Various colors required, but just as the waist armor, painting on white parts is not a hard task at all. "Colorful" tiny spots:
- dark gray for the top of the knee armor, knee joint (on the rear side of the leg, for show only XD), and supporting thrusters behind the lower legs.
- blue for the "topping" of the leg.
- red for the mouth of the thrusters.


Just panel-lining for the bottom of the feet. Gray would be better, to show it's part of Destiny's mecha.
But looking at all the tight spots and the elevation makes me think otherwise ^^;

For the next review, we'll move on to the "rear view" of this model: the backpack and weapons ^^