Tuesday, April 28, 2009

The All Exia Project Part 7

Commercial break

Not quite a progress report on my All Exia Project, but a display of more parts to be painted after Part 6 instead. ^^;

HG Exia will be in the limelight today ^^

But before that, a few more parts I left in Part 6:


The base for Exia and Avalanche Exia. There are two types given for the later, can you spot the difference? ^^


A little hexagon-shaped vernier on top of the base needs to be painted in white. I painted the first layer as shown, as with the one for 1/144 Exia as well.

More work for my Gundam Marker Gray: ^^;


Front skirt armor and upper arm,


The split between the thigh armor, and the mecha part for the feet.
Unlike the bigger 1/100 scale equivalences, the pelvis joint is molded together with the thigh, so the pelvis armor becomes part of the project as well - as with the mecha part for the feet.


The split in the waist - done, pending for a round of scratching off the excess paint.


The chest piece - no more ring as seen in Part 6. ^^ The area to be painted around the GN Drive is wider as well.


GN Vulcan on the forearm - panel-lined the boundary before the actual paint job.

Will be showing you the full result for Part 6 and today's review in the next round of update.

Sunday, April 26, 2009

The All Exia Project Part 6

From the hardest to the easiest

Done with the helmets in Part 5, the Project is now at the easiest stage ^^ - painting all the tit-bits in gray.

Only one Gundam Marker is needed this time: Gray (d'uh ^^;)

1/100 Astraea, Exia and Avalanche Exia first:


The split in between the thigh armors.


The split in between the feet and shoes.


The front of the shoes not covered by the armor.


The split in between the waist - need to use toothpick to paint the gray area as it's too small for the tip of the Gundam Marker to go in.


The bottom part of the upper arm where the GN Stripes goes in.


Gray part for the front skirt armor. You need to define your own boundary at the side as there's none being designed.


The ring for the GN Drive on the chest. All four in total - three Exia-types and one new one for Astraea I missed in Part 3 - thanks to Quentin for reminding me about it ^^


The stripe for the GN Vulcan on the forearm.

More parts, including that for 1/144 Exia coming up next, which happens to be the last round of discussion on parts to be painted as well. Will be showing you the result in Part 8. ^^

Thursday, April 23, 2009

The All Exia Project Part 5

The most difficult part to paint

The helmets of Exia and Astraea are no doubt the hardest parts to paint in this entire project. You will need to use yellow, a bit of black, gray and light blue in various hard to reach places for the head, which are considerably small enough.

The 1/100 scale Exia's helmet has better design for painting in my opinion, as the helmet is molded in four separate parts, which makes painting a little easier. However, You don't even get to enjoy that bit of convenience for 1/100 Astraea and 1/144 Exia though. You have to squeeze the color through to those parts intended for those two models. ^^;

With that said, I'm painting all five helmets in one go, so that when I get to assemble each one of them in the future, I won't go screaming, "You again?" with plenty of sweat drops XD

Parts to be painted:
* 6 x 1/100 Exia type helmet - gray and light blue
* 2 x 1/100 Astraea type helmet - gray and light blue
* 6 x 1/100 Exia's sideburns - yellow and gray
* 2 x 1/144 Exia's helmet - gray, light blue, and yellow

Gundam Markers used:
- Gray from SEED Basic Set
- Light Blue from SEED Destiny Vol. 1 Set
- Yellow from SEED Basic Set


Started by panel-lining the slits on top of the head to help separating the border between areas to be painted in gray and light blue.


It's a long way to go for 10 parts to be painted delicately in gray, so squeezing the paint into a small pool like how I used to do in the past would be really wasteful.
Instead of that, I detached the head of my Gundam Marker Gray to get the paint from the marker itself. ^^


Raw finishing.


Second color going in was yellow for the sideburn.
As you can see, the parts for the sideburns and GN Condenser are separated from the helmet for 1/100 Exia, while there's no separation for the 1/144 scale version.


Parts painted in gray trimmed properly (by scratching off spilled over painting), but with the yellow sideburns pending for the same treatment.


Yellow sideburns trimmed, and the GN Condenser panel-lined before the next color.


Gray for the protruding part behind the sideburns. This part is flat and large enough for the Gundam Marker to be used directly onto it.


Moving on to the last part: light blue GN Stripes on top of the head.


Part separation for 1/100 Exia is very helpful for the painting of this part as there are more rooms for the Gundam Marker to maneuver, and less worries about spilled over painting. No part separation for 1/100 Astraea and 1/144 Exia means there's plenty of trimming work to be done after this. ^^;


The GN Stripe of 1/100 Astraea.
Like a hair cut, one has to make sure that the width of the stripes are well balanced on the left and right side of the head. ^^


A little bit of black right beneath the forehead to emphasis more on the eyes of the complete model.

Seems pretty fast for all the painting this time? ^^; Not exactly, the main reason is because I talk a lot less this time (Ha! XD) and show more photos instead. There were actually long pauses in between the different layers of painting, to allow the parts to dry off properly before moving on. It's not just about avoiding the colors from mixing with each others when the painting is still fresh, it's also about avoiding the painting to be rubbed off by your hand as well.

Tuesday, April 21, 2009

The All Exia Project Part 4

Call me a tortoise

缩头乌龟 to be exact, meaning a coward ^^;

Quentin's going to laugh his head off now, because I didn't keep my own promise to myself at all. ^^;

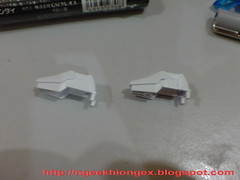
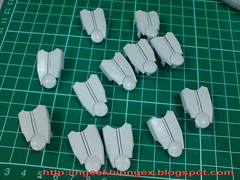
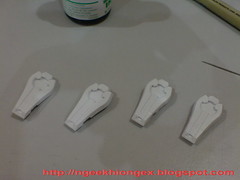
I didn't paint the edge portion of the GN Sword in silver.


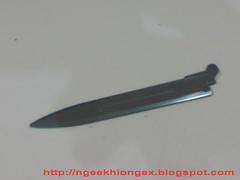
It seemed like a natural decision to me when I was planning this project, that the edge must be in silver, else the whole sword would look pretty much like a huge but plain plastic plate. It looked so awesome in the anime as well. It was after I tried my Gundam Marker Silver on the smaller HG version that I got to see that it was not going to be as good-looking as I initially thought it would be.

The layered paint result is one thing (very ugly one too >_<), the missing boundaries near the point of the sword is another. That's fine for Astraea, because its GN Sword has a clear border to help you identify where you silver painting should stop. Not for Exia's though, and I have four of his GN Sword to paint ^^;

I remember my experience with MG Zaku II Ver. 2.0's Heat Hawk, where its curved edge has no clear boundary either. As I painted more layers of yellow for that part, the spill over became more and more uneven. In the end, I just rubbed the part clean, with a lot of frustration. ^^;

It would be very easy with spray can and masking tape I think. But that's what "I think". I never tried that before, and since I never used it before, I can't tell if the result is going to meet my expectation or not.

Like thinking how easy and nice the edge is going to be with just Gundam Marker Silver, but it's not, at all. ^^;

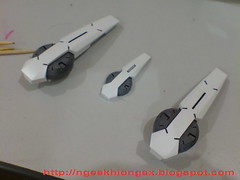
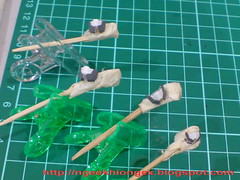
With the silver edge of the GN Sword out of the picture, I just panel-lined the details on each of them, and done. Less than 5 minutes for that.

And since BB Senshi Exia's participation in my All Exia Project is his GN Sword alone, his portion is all done too XD

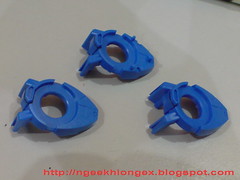
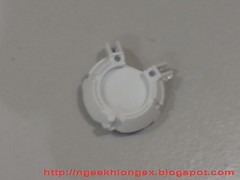
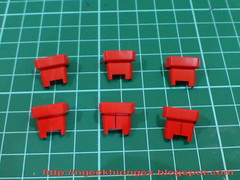
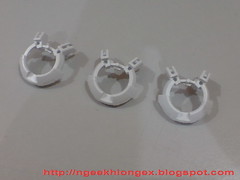
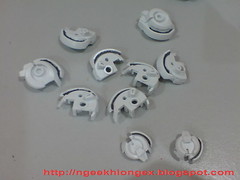
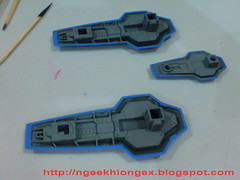
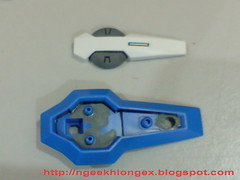
The shield portion of the GN Sword needs quite a bit of painting though.


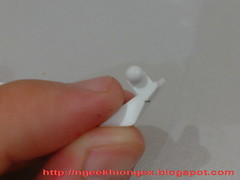
Gray for the "barrel" on the white face of the shield.


Gray for the back of the shield as well.
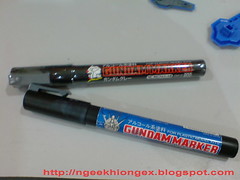
A new Gundam Marker Gray to share the burden of the same color from SEED Basic Set.


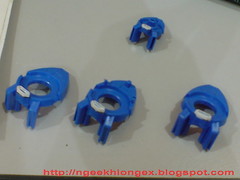
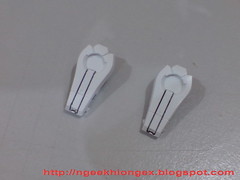
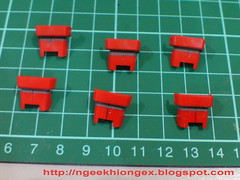
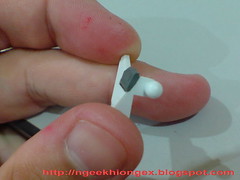
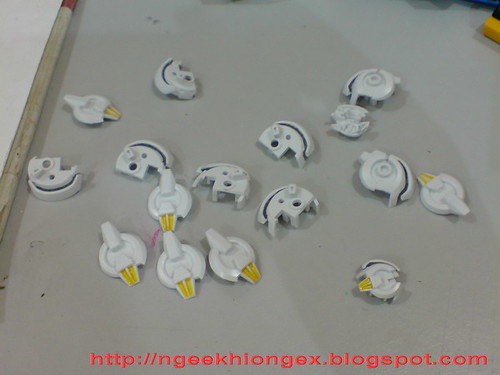
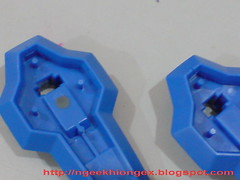
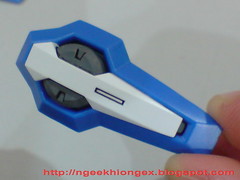
Raw finishing, before the paint spilled over onto the edge of the shield is scratched away...


... and after. I'll wait for the painting to dry off even more before panel-lining the details.


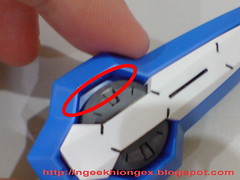
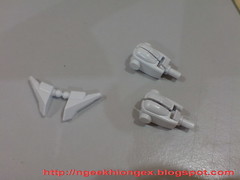
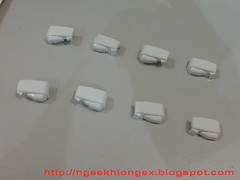
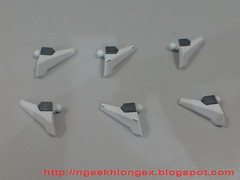
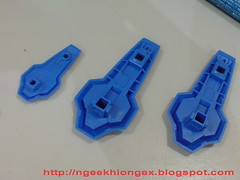
Several not-so-obvious parts to be painted in gray.


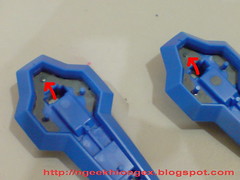
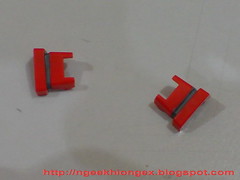
For the 1/100 scale version, I cut away the insertion point as indicated by the red arrows for much easier painting. There are still a few more insertion points that can hold the white part in place.


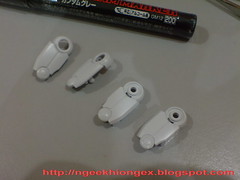
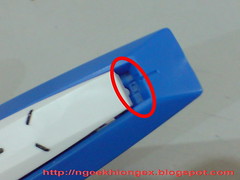
Same treatment for the 1/144 scale version as well.

And a little prelude to the hardest part for the entire project - the helmet.

The face is the easiest part to paint when it comes to the head. ^^;


Painted the cheek in gray.

I'll dedicate the next review to the four helmets. ^^;