Review on my Gunplas has being really slow lately, my apology to everyone about that, sorry for keeping interested folks hanging on to a lot of stuff. ^^; Actually I've done quite a lot recently, for different kits some more.
But writing the reviews isn't too easy a task ^^;
Anyway~
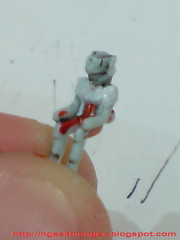
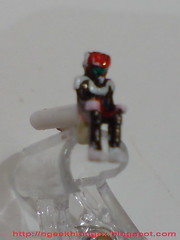
The cockpit done in Part 10 isn't complete when Shin is not sitting in it yet, and the pilot figure will be the focus of this posting.
Painting the pilot suit of SEED/SEED Destiny MGs ... ... *_*
* Draw breath *
Actually it wasn't that bad. ^^; I actually painted the figure the same time when I did the sticker screens as well. Since I used Gundam Markers here and there, some time was needed for the paint to dry before moving on to the next step. So while waiting for that, I painted the pilot figure as well. And while waiting for the pilot figure to dry after a particular layer of paint being applied, I went back to do the cockpit again. Saved quite a bit of time there.
Then again, working on just two parts for a single night might sounds outrageous to you XD
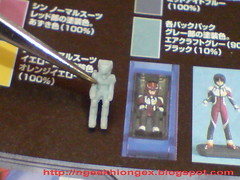
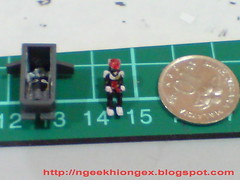
Comparing the actual figure and the paint guide in the manual. Exact size ^^
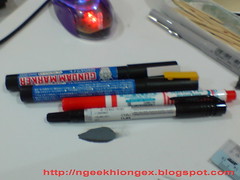
Colors needed: white and gray (Gundam Marker, gray is not shown here), red and black (fine-tip normal markers), metallic green and a bit of gold (normal pen).
Gundam Marker Yellow is also shown here, but due to change of plan in the end, I didn't get to use it at all. ^^;
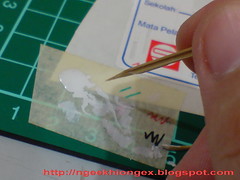
I always start the painting of a pilot figure with panel-lining it first. And how to panel-line such a small figure you ask? Just unleash the panel-liner onto the entire figure and clean it up with a piece of tissue and toothpick later.
Like some of the other parts I painted, these initial panel lines are not meant for the completed figure. Rather, they are for our eyes to recognize the borders between the separate colors intended, so that it would be much easier to paint after this.
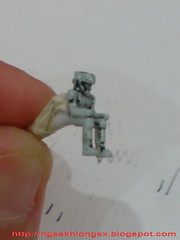
First color in was red, mainly for the helmet, body and thigh. I cleaned up spilled over color by just scratching it off using art knife.
A fine-tip marker can help you to get to those really tight spots like the groin area. But when that part proved to be troublesome for your marker, or if you want to protect your marker's tip from being damages, just use a toothpick with Gundam Marker Red for that part then.

Second color in: white, for the helmet (face and ear area), body (chest and shoulder), gloves and boots.
I could paint the body by using the marker itself, but for those tiny components on the helmet, I had to squeeze out a little pool of paint from the marker and use a toothpick to paint them.
Too bad my painting for the gloves was mixed with a bit of red from the pants, resulting in the rather pinkish right glove. >_<
Panel-line again to enforce the border between the different colors of the suit.
When the paint on the helmet is completely dry, use a sharp toothpick to draw the two "L" patterns on the forehead area of the helmet.
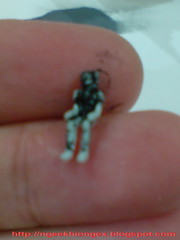
And after that, third color - black, the most absolute color of them all went in and covered almost all other parts for the body. ^^
Fourth color in: metallic green for the visor of the helmet.
Supposedly in flesh color as according to the manual, but I wanted a color to emphasis upon when the pilot figure is revealed in the cockpit. Shiny green for the visor seemed like a good choice to me. ^^
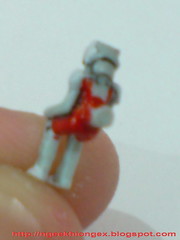
Fifth color in: gold. I painted the tip of a sharp toothpick and used it to draw the FAITH crest on the left chest, plus two ZAFT insignias of either sides of the shoulder.
For the crest, I made quite a big one there. XD Was trying to draw the wings of that little crest, but it didn't work out well there.
I didn't use Gundam Marker Yellow as shown at the beginning of the posting because the paint needed was really very little. It's going to be quite wasteful to squeeze out paint from Gundam Marker Yellow (or Gold if you like) just to be using just a little bit of it.
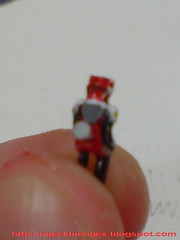
Sixth color in: gray. Like how I did for the cockpit screen mentioned in Part 10, I cut out a little piece of sticker with the shape of the pilot suit's backpack (life support unit?), then painted it in gray and stick it onto the back of the figure. Not only will the shape be totally accurate (as compared to manually paint that part on the figure), there's a bit of 3D effect too. ^^
Also, this will be the last time you get to see that there's actually a backpack for Shin's pilot suit. Once he is inside the cockpit, he's be sitting there without turning one bit, and the backpack will be hidden forever.
As with the cockpit, I just did it for personal satisfaction.
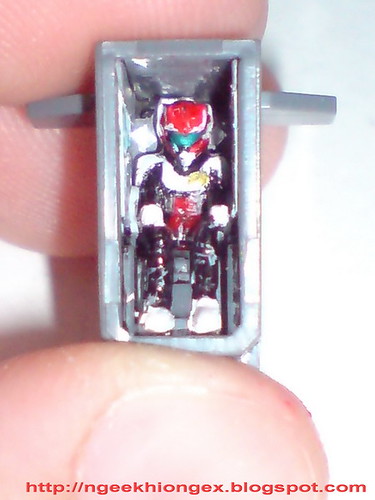
With that done, the pilot figure is now complete. ^^
The two parts done for a single night. All hail my speedy progress XD
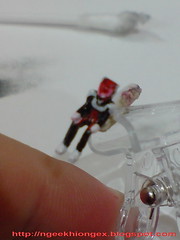
Also, you can easily spot the two control handles I did from Part 10 in the cockpit from the picture above. I did try them out as you can see, but they look totally weird after I put them into the cockpit. They are just too large no matter how much I trimmed them. ^^; The original mecha setting from the anime shows them being just two small sticks on the left and right panels of the cockpit, but mine are so big the pilot couldn't able get into the cockpit without detaching the handles first I think XD
So, I just pulled them out, and there's no more control handles for Destiny now. XD
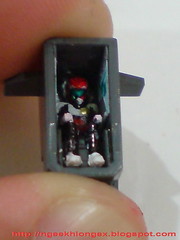
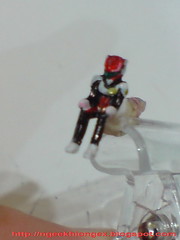
Fit into the homemade cockpit just nice. Success!
By using a tweezers to get the figure into the cockpit, a bit of color was scratched off from his pants, but that's fine, I'll return to touch up on that before the final assembly.
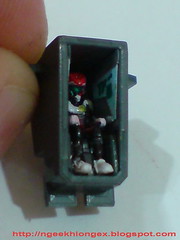
Also, a very tight seat for Shin indeed in his cockpit ^^; The elbows of the figure actually pushed the two wheel-like attachments added previously further back behind the walls. A good thing actually, because they are behind the control panels instead of sitting side-by-side with the pilot.
Then again, that just made the work I did in Part 10 less and less visible now. ^^;
This is the kind of stuff my friends would call "gei-liao" (totally unnecessary), but I like it nonetheless. Beautifying the final model is not exactly the main objective for the cockpit and pilot shown in these two reviews, but it's for that sense of satisfaction instead. For the idea I came up with all the sudden after looking at the empty cockpit, "Can I do it? Do I want to do it?" were the only things in my mind for quite some time.
And just like the replacement joint for Destiny's beam launcher, the only way to answer those two questions of mine was to go in and try it out myself.
"Do I want to do it again for MG Infinite Justice or Force Impulse?" Can't really say yet, it's depending on my will I suppose. I did left out a part for Shin though - his seat belt. If I can do the enhancement for the seat, the seat belt shouldn't be a problem. ^^ I think I will try that out for my future MGs.
But after the cockpit and pilot figure for this, I don't feel like I want to see the cockpit and pilot figure of another MG for a while XD


7 comments:
Wah, that's a lot of work there you have done for such a tiny piece. ^^;
About the hand...
"This right hand of mine glows..." and you get the rest. XD
you are one crazy guy nk...
that was a compliment btw =D
another 3 letters on this
W-O-W
so this cockpit can be considered "pass" now? lol
His cockpit is definitely not overkill by any means. Eventhough later....the cockpit will be closed most of the time. But heck, when is open, is a wonder to see. Good work fellow Gundam Meister!
Very niec there painting the 1/100 Shinn. I will have to see whether I have the guts and skill to paint the many 1/144 soldiers I have in my draw back home......
>>CD
It would work if ZAFT had installed the Mobile Trace System into Destiny as the secret weapon. Huhhuh~ XD
>>AstrayP03(Zhe)
Thanks. That's why my speed in building Gunpla is unmatchable by anyone - I'm the slowest of everyone XD
>>wencong1356
Thanks thanks :D
>>Mendagu
Yes, can be considered pass already. ^^;
>>Gundam Guy
Thanks. The best achievement is self satisfaction I believe, since so much enhancement do not really affect the articulation, or the general function of the model as a whole. It's just a very fun thing to do in the whole process. ^^
>>Q
Thanks. 1/144 scale soldiers are much harder than 1/100 scale pilot figures. That would definitely take a lot more determination and concentration.
Post a Comment