A continuation on the repair of my MG Zaku II from yesterday. ^^
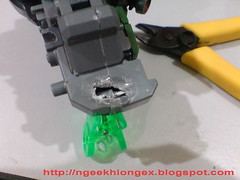
After the "extension" of the hip joint is completed, time to work on the hip itself. The aim is to cut away some part of it for the joint to go in.
What I did first was to use the metal file tool to do a rough sanding on the part's surface. Later I found out that it was actually not necessary - that damaged part was supposed to be cut away anyway. ^^;


It was a combination of knife and nipper work really - cut out an opening with the knife bit by bit and then use the nipper to chip off the part, bit by bit again, which took me some time to get through. Extreme caution is needed. Knife work is always no kidding. I'm also worried of breaking the other joint during the work. ^^;
As mentioned in the previous review, the original design was hollow center for the hip. That was supposed to be a great convenience to this work, until I found out that the connector between the front and rear body parts (molded together with the hip) was right in the middle. ^^;
So, just like what I did to the joint, I had to drill a hole in the hip for the toothpick to fit in.

Of course some measurement is needed, so that the joint on both sides of the hip will be correctly aligned. The result:


Just nice. ^^
Phase 2 on the hip is completed. Now onto the third phase - closing the gap between the hip and the joint. That ugly cut wound and part of the toothpick that is exposed need to be concealed. Like planting a tree, you need soil to support the tree to stand on its own. In my case, the toothpick is the root, the joint is the tree, and the special tool to be used will become the soil.
This one to be exact:


Tamiya Epoxy Putty Quick Type. "Quick Type" as in there are many other types offered, but this is the one I read about most of the time. It's like a special plaster meant for model kits. Very very soft before processing, much like chewing gum. Once it hardens, it will be as tough as plaster. Professional modelers use it to refine or to create new parts on their models, I will be using it to plant my tree. XD
As you can see from the right image above, there are two "slides" of putty included as a set. You're supposed to mix them to get the composite as the putty.


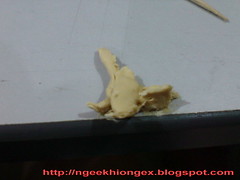
In equal portion, the white bit was mixed with the brown bit, and the result looked a little bit like bread to me. ^^


Bread factory? XD
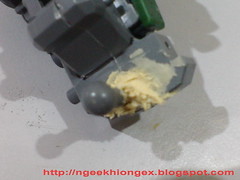
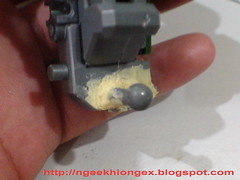
And then it was just stuffing the putty onto the opening between the hip and the joint, like this.

Smoothing the surface with a toothpick helped to get rid of some of the excess putty.


Quite a bit of putty wasted there. ^^;
Waiting for the putty to completely dry will take one day. You will get to see the final result in the next review.


2 comments:
hoho~ soon we can see NK doing extreme Mods XD
The MG Zaku II F/J was my first MG and mine suffered the EXACT same break on the EXACT same side! I tried the "welding" method too, also to no avail. I eventually took a spare ball joint system from another model and crammed it into the hips of the Zaku.
Post a Comment