Shiba-I Sazabi is the very first BB Senshi Sangokuden model I bought. At this point, the other releases I have are Koumei ReGZ, Chouryu Gelgoog and Shusou Doven Wolf.


Several of the parts which require some heavy duty painting. ^^;
That's right, even for the BB Senshi line, Zeon mecha still appeals to me more XD
To be frank, I'm not a huge fan of BB Senshi Sangokuden, or the SD line in general. Just thinking about the amount of painting is enough to put me off. ^^; The main reason for the purchase was because of Sazabi itself. Amazingly, this is the first SD Sazabi after the G Generation Zero version released over a decade ago. I use the word 'amazingly' because its rival, Nu Gundam had received the upgrade from its G Generation Zero version to the much better G Generation F version, much like Ver. 1.0 to Ver. 2.0, but we have yet to see the same upgrade for Sazabi. While the wait goes on and on, the white, musha version, Shiba-I came out instead.
It feels like there's something missing in the whole chain of Sazabi's SD model list. Shiba-I is Sazabi in white, so there's very little feel of coherence when you line him up with his HGUC or MG 'brothers' XD
Anyway, it's definitely better than having no (newer version of) SD Sazabi at all.
Shiba-I Sazabi is the military adviser of Sousou Gundam. This makes him the direct rival to Koumei ReGZ, the adviser of Ryuubi Gundam. It's a very brilliant arrangement actually, since Sazabi and ReGZ did fought against each other in Char's Counterattack, before Amuro Ray upgraded from using ReGZ to Nu Gundam.
In the story of Sangokuden, Shiba-I is Sousou's adviser right from the start (at least that's how I understand the story from the manual), while Koumei only joins Ryuubi a few chapters later. However, that's the opposite in the original novel, Romance of the Three Kingdom, Zhuge Liang (Koumei) started assisting Liu Bei (Ryuubi) a few years earlier before Shima Yi (Shiba-I) became one of Cao Cao (Sousou)'s most important strategist. As a matter of fact, Shima Yi's contribution is more towards Cao Cao's son, Cao Pi (曹丕) instead of to Cao Cao.
The grandson of Shima Yi, Shima Yan (司马炎) united all three kingdoms and established the Dynasty of West Jin (西晋), thus ended the period of the three kingdoms.
Back to this BB Senshi kit, there are only 57 parts in total, a lot less than those SEED/Destiny SD kits, but please bear in mind the price difference as well (500 Yen versus 800 Yen). Then again, the playability is quite awesome nonetheless. There are more than 10 BB Senshi Sangokuden models now, and their joint designs are pretty much the same. There are 10 points of articulation, all ball-type joints, excluding the backpack, weapons and other add-ons.
Well, I'll have to assemble the model to play with these joints myself. ^^
BB Senshi models are mainly targeted at younger group of customers. This is evidenced from the design of the Gate connecting between the part and the runner. Very little Gate touches each part, so you can actually tear the parts from their runners without a nipper. That's convenient for beginners, but unfortunately, the risk of the Gate tearing off bits of the parts is very high as well.
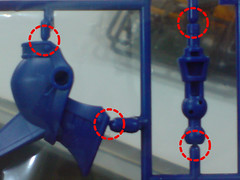

Cut far away from the parts for their 'safety'. Much better for more work afterward than having ugly wounds on the parts eh?
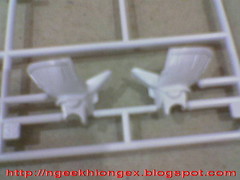
* photo shows BB Senshi Sangokuden Chouryu Gelgoog instead (All parts for Shiba-I Sazabi are off their runners at this point).
With few number of parts, the pre-assembly work is more on painting actually. Since the model is all white, painting is quite simple. Now that's my most sincere conclusion after doing Koumei ReGZ. ^^;

One thing that would really put a sweat drop on your head (anime styled XD) is the lack of a painting guide. The construction manual has eight pages in total, four for the comic, and the rest are black-and-white assembly guide. The only spot showing you the paint scheme is on the side of the box.
So, sometimes, how the painting goes for some parts is really up to you. ^^;
The interior of the armors is one example. The box art shows white, but the painting scheme shows black instead. Which one would you follow?
I opt for the later ^^
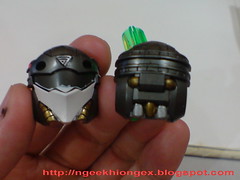
Another cool stuff about BB Senshi Sangokuden series is the name of the character molded on the heel. That's right, molded, not sticker. You can use it as a stamp if you want to. For Shiba-I Sazabi, the design is really quite something, as his name 司马懿 in Traditional Chinese characters is very complicated.
The molding is awesome, but painting the black background of the name is hard: the gap between each stroke of the characters cannot be reached by any panel liner. ^^; I called upon a 'secret weapon' to accomplish the task XD

To get the name, use Gundam Marker Black to fill up all the base first. Covering the name as well, no problem, will remedy on that later.

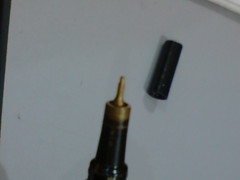
Here's the secret weapon: Ammeltz Yoko Yoko. Just wet a cotton swap and wipe off the black paint on top of those characters.
Black paint on the character gone, black base remains ^^
Ammeltz Yoko Yoko, relieve you of your muscular aches, and occasionally good for Gunpla-ing as well XD
Other parts with painting completed:

Golden stripes on the chest, shoulder armors, and front skirt armor can be a bit excruciating to paint as well. Let me introduce another good tool for you:
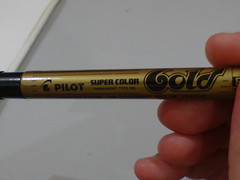
Pilot Super Color Gold Extra Fine. With really extra fine marker tip. Fast to dry, and 'accept' panel-lining later on as well XD
Those golden bits on the fan and the sword are from the Gold Marker mentioned above as well.
Painted gold and silver for some of the parts on the head, not according to the painting scheme of course.
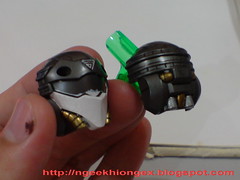
I use white for the mask, instead of using the silver sticker later on, so that the mask would look more coherent to the white helmet (and overall body).


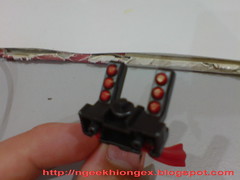
The 'battle' type helmet. The pink targeting sensor in the middle is from normal pink marker.

Gold and silver for the hydraulic pipes and hosts behind the upper arm.
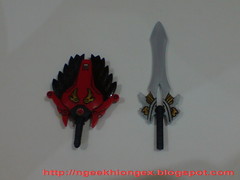
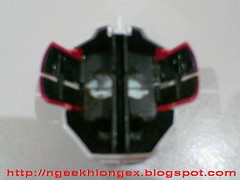
Painted red for the 'Funnels' as a homage to Sazabi. ^^

A scroll stuck in the middle of the backpack. XD Painted gold for the robe that 'ties' the scroll.

Black for all the interior of the armors to give more depth to them. This one is the skirt armor.
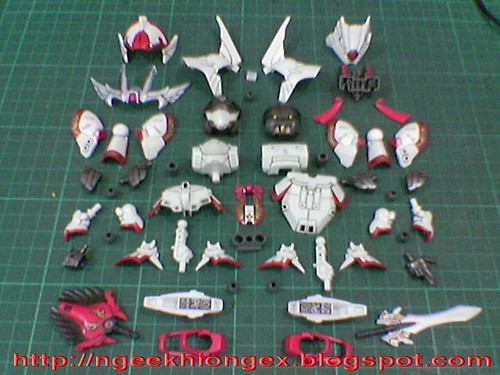
All parts painted!
These are all the parts for this kit actually. ^^
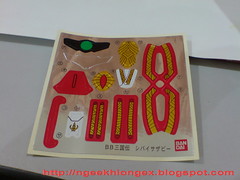
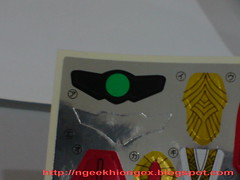
After all the painting, all I need from this sheet of foil sticker would be just the eye ^^
Part 2 soon. ^^
All images in Photobucket Gallery. Will update as the progress goes along.
[Note:] This review was actually being drafted way before the the establishment of this blog, back on my main blog ^^; So the review is kind of messy. I'm sorry for that. ^^; Some photos were taken with my old phone, some are new ones, and some were taken just for this posting, because 'I just thought of that up' at that moment. This is something I'm trying to avoid in the future actually. Forgetting some good stuff to write up.
Unfortunately, I still have to clear up another two or three items for reviews before I could start on a really 'fresh' one ^^;


12 comments:
nice gold marker...whr u get it anyway =P
>>Anon
Got it from a local stationery store, just a typical one, not specialized in design or art stuff. Just saw it by chance in the store and bought it. Haven't seen any in other store though...
The price was around RM5 if not mistaken.
Does the paint from that gold marker tarnish?
does ink little sticky even after it dry?
Btw, my friend got BB sangokuden with english translation for the story at instruction paper.
Gosh I found that Pilot Super Colour but they don't any color beside blue & black......what a day.
Hey did you sand the parts before painting?
Im a noobie and i painted my Kongming model whithout sanding and it ended quite bad... colour all over the place...
can you recommend any sanding paper (types, kinds)... and the plastic to cover parts during the spray process..
>>Anon 1
You mean the gold marker? Nope, it dries just nicely.
All my BB Senshi Sangokuden kits after Shiba-I Sazabi have comics in English too. ^^ The translation isn't too accurate though ^^;
>>Evaritus
Oh, too bad. I got them just out of coincidence too. Don't really know which store really sells them.
>>Anon 2
Nope. No sanding for all my Gunplas. My methods are quite 'home made' ^^;
Hmm... Seems like I had to use fine brush to paint gold details nicely.
Hope really hope could find that marker though, only 1 place haven't go (since most shop still close here..=.=)
=)
what red paint did you use? I had a gundam red marker and it did not come up well on black parts. I did not try it on white parts though.
waa "home made"... geng.
can u share any tips 2 paint d SD Sangokuden models... i still have 4-5 kits yet 2 b painted cz im afraid i might spoilt everything...
>>Anon 1
Red Gundam marker from SEED set. From my experience, you have to shake it well to get the right color, especially after long time for not using it.
>>Anon 2
Painting SD kits needs more patience than normal kits. Each of them has less parts than the regular HG kits, but requires much more work and time (for me). Quite a bit of time has to be spent to allow the paint to dry before applying another layer, and another to get the best tone.
hi how do u get rid of the mistakes u made by the gold marker anw? i tend to slip easily :/
Post a Comment