Started working on my 1/100 Astray Red Frame, with the usual painting and panel-lining first.
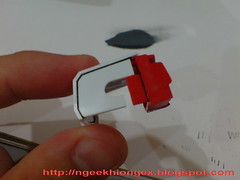
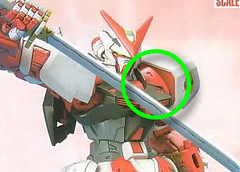
Molded entirely in white following the shoulder armor, its side plate should be in red.
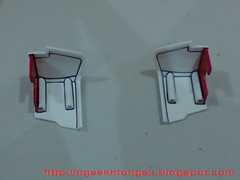
Side plate painted, but just that part in red seems very awkward there. ^^;
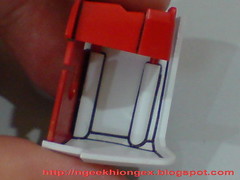
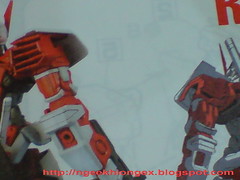
Checked the manual and found that the top portion inside the armor should be in red as well, much like the part extending from the red 'verniers' behind the armor.
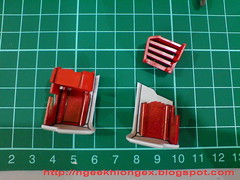
No clear separation between where should be in white and where should be in red makes the paint job quite confusing ^^;
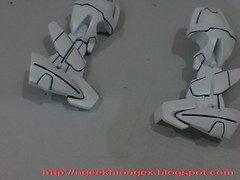

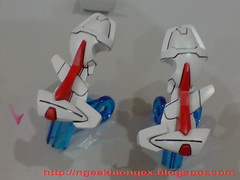
Red for a small part protruding at the end of the leg near the ankle - seems like the extension from the red bar above it.

Interior of the knee covers - completely white as opposed to ...
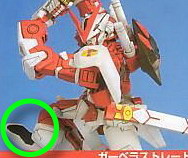
... black as seen in manual.
Supposedly the shadow for the unseen interior of the armor, the part is too big for anything to be kept in the shadow though. ^^; You'll need to create "artificial shadow" for it if you want to follow the paint scheme XD
Gundam Marker Black is good for the job, but quite a lot of paint is required, and I'm not exactly keen in using so much from the marker for a part which won't be shown much when the model is completed. I'll use something else instead:
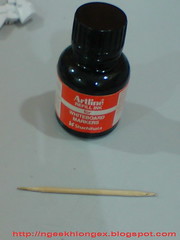
Refill ink for whiteboard marker and a toothpick as the painter is good enough for the job. The trick is to use the toothpick to drop drips of ink from the refill to fill up the interior of the knee cover. The toothpick can be used to distribute the ink more evenly around the corners as well.
I used normal permanent marker for the edges of the parts though - easier than using the toothpick and refill ink.
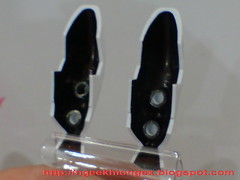
Painted the knee covers from both legs at the same time - they are the same for either leg.
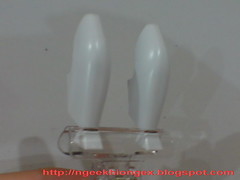
No matter how black the interior of the cover is, the front portion is not affected at all ^^
The refill ink and toothpick trick is best to be used for tight spot where even panel-liner like Sakura Micron 0.05 can't reach. There are a few really tight spots for this 1/100 Astray Red Frame, the first one coming up is:
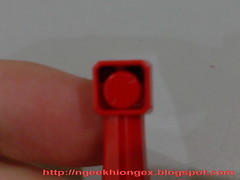
Black interior behind the red cap for this particular part of the leg.
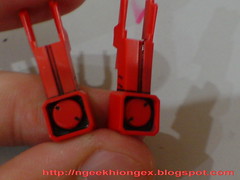
One drop of the refill ink and you get to see the ink flows furiously around the part. filling up all the spaces you require.
A few reminders for you if you're thinking of using the refill ink mentioned above though:
- you can't really control the flow of the ink once it hits the surface of the part you intend to paint. Unless you're really sure that those parts can be covered in the color of the refill ink, else don't use it.
- Spillover from using the refill ink is even more unavoidable as compared to Gundam Marker, but the good thing is, the dried ink is much much easier to scratch off as well. So for spillover paint, just wait till it's completely dry, then use your art knife to scratch it off.
- the refill ink is alcohol-based and the fume can become quite unbearable after a while if you're using it in a closed room. Do open the windows for better air ventilation.
- I only see the basic colors of black, blue and red released as refill ink at the moment. So not many fancy colors you can think of for using this method. Use only when necessary then I suppose. ^^;


14 comments:
this post is awesome esp for those in sarawak who has problem accessing to those tamiya/mr hobby colours.
but you made me feel bad for leaving the interior kneecap unpainted haha.
bit sidetrack...mind telling me what brand of orange marker you're using? so far my search only came up with orange coloured highlighter and kiddy 'magic' pen which of cuz can't be used to paint gundams ><
>>Peter
Orange marker? I use the normal permanent marker from Yosogo - the one with yellow wrapping. Not sure if it has individual release, I got it from a set with other colors like purple, brown, green included.
Haha nice to see more examples of using normal stationary over hobby/modelling paint tools~ I like that~
Question: is the refill ink water-y or izit sticky like dark soy sauce? lol...
and if so.. how to make it more water-y?
one question ngeekhiong, will the marker pen refill ink result in a shiny glossy effect?
My experiments with normal marker pens (not the refill ink that comes in a bottle) is that it leaves behind a shiny coat which eventually becomes blackish-green when dry; which isn't exactly pleasing on the eye to be honest.
>>Q
Even more of these home-made tricks coming up XD
>>Flying_Ukui
It's very watery - no need to add anything, and dry very fast as well.
If you really want to make it even more watery, add in alcohol I think. Refill ink is alcohol-based.
>>StarGhazzer
No for the whiteboard marker refill. The result is quite smooth actually.
Yes for normal marker though - glossy paint. That's why I'm avoiding using them on large surfaces after I started using Gundam Marker. Depending on the brands of the markers, some are good, some would give you alternate colors.
From my experience, Yosogo - alternate color guaranteed, Stabilo & 神奇笔 (from Taiwan) & Faber Castell - best colors. Faber Castell's marker has much glossier colors than the other two. ^^;
ok! yosogo! i'm hunting that down haha.
been neglecting my blu duel for bit too long due to the lack of orange.
>>starghazzer: maybe its just me but i find the 'glossy' from normal permanent markers look awesome on certain small parts like those facepipes on Ginn/Cgue.
>>Peter
I got a bit worried when you mentioned Blu Duel, because paint the orange parts would be orange on blue (not sure light/dark) parts right? I believe you also know that the color of normal markers are not strong enough to beat the base color right? Yosogo's orange marker would look orange on white parts, but for the other colors, I recommend painting a layer of Gundam Marker White first before using the normal marker.
Or Tamiya Orange marker for plamo?
http://www.hlj.com/product/TAMPM-X6
urghh...tamiya paint marker.
i got the white (X-2) and royal blue (X-3) and i can tell you i regret forking out RM13 for each.
the marker tip sucks because its rough (feels like those rough green sponge one uses to scrap their frying wok)...
i only use the white (x-2) to do first layer on dark surfaces needed to be painted white. since its enamel by just layering once then after it dries painting 2nd/
3rd layer with gundam white marker does the better job of beating the base color.
can't find tamiya orange marker here in miri sadly. think i'll just first layer with tamiya enamel white and 2nd layer with the yosogo orange...provided i can find it haha.
umm.. not a good idea painting white before orange or any other gundam marker colour..
y? simply coz the colour will dissolve the white while painting so in the end u get a lighter tone of orange, and consider urself lucky if it's smooth, the least. XD
cool... maybe I'll try refill inks next time. The one I did was with the yellow-barrel Yosogo and it was UGGGGHHH blackish-green. Faber Castelle wasn't too bad as the glossiness tends to fade over time, but at least the black remains black.
>>Anon
Good call there. One does face the risk of messing the base layer with another layer of paint on top of it. From my experience, the longer you let the first layer to dry, the harder it'll be for it to get dissolved by the second and subsequent layers.
But the waiting can be quite a long time.
Haven't tried different colors for different layers, but I did see from paintint the many layers of white on BB Senshi Sangokuden ReGZ, and then Destiny that if the base layer has dried well, the paint doesn't come off when another layer is applied.
agreed.
but so far i have no such problem of original layer mixing with the subsequent layer..maybe cuz my white base is enamel (tamiya marker X-2) while my subsequent layers are acrylic.
enamel painting is challenging though for me. My throne zwei's sword which a huge part was white wasn't really 'smooth'..plus it has that 'thick' look. urghh.
Peter,
for base coating for white u could alwez use anchor or nippon spray paint, white colour.
it does a great job and dries up fast and doesnt affect the after layers.
btw, anchor white is really white - gundam white
nippon white - a bit yellowish
Post a Comment