Returning to Shiba-I Sazabi after more than two months ^^;
A rather minor update this time, but very important for my Shiba-I Sazabi nonetheless.
Mentioned about my enthusiasm for mono-eye MSs in the previous review on 1/144 HG Tieren. Instead of using the foil sticker, I painted the mono-eye camera of Tieren even though it's movable.
All that work is optional, but I won't say the same for Shiba-I Sazabi even though it has the foil sticker included for its eye as well. ^^;

The box art shows the eye moved to the left, which looks really cool. For the actual model however, you get the eye fixed right in the middle of the foil sticker. By using that foil sticker, you can never get that coolsome stare from Shiba-I Sazabi as seen on the box art.
We'll have to remedy on that by giving Shiba-I a new eye.

Items required: sticker, sticker book, paper punch, and Gundam Marker GM09 Eye Green.
The stickers used are just the paper-based ones you can find in stationery stores, bookstores or prizes inserted in magazines and comic books. I have a few books of stickers from my primary and secondary school days actually. Some I would keep, some are just there because it seemed like a waste throwing them away.
The ones I used are Manchester United's Treble Feat back in 1999 included in a football magazine I bought back then. Being a Liverpool fan, I'm glad I didn't throw them away in the past, because now they can serve a greater purpose for me ^^
MU fans don't get mad at me, ^^; I don't mean to take it out on your team by punching some holes on the players, but it's because the stickers are of better quality - stickier, allowing the results of the work to be better as well.
For the sticker, please choose the "shiny" ones - those with a glossy surface. If you use the ones meant for note-taking, it's not going to work.
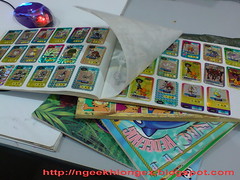
My sticker collection since primary school days.
The general idea is to punch some stickers, paint them and use them as the mono-eye camera instead. Then if you want to change the position of the eye, just detach the DIY sticker and stick it in the position you want. So, you need to choose a really good sheet of sticker so that it'll be durable.
Speaking of which, a good paper punch is also a must. Unless you like your Shiba-I Sazabi to have eyelashes, it's time to get a better punch for this task. ^^

The color of Gundam Marker Eye Green is very close to that from the sticker.
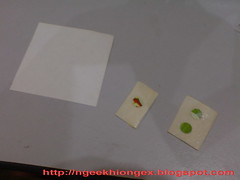
- Use the paper punch to get a few dots from the sticker.
- Use double tape or folded paper tape as the base for dots.
- Cut a small sheet from your sticker book to be used as the holder of those dots after they are painted.

- Wait for the paint to dry. This will take quite a while (around half an hour).
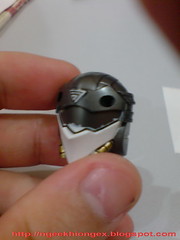
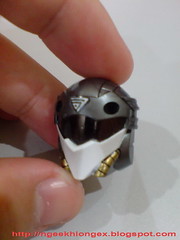
- Mean time, paint the whole eye area of Shiba-I Sazabi black. Normal permanent marker recommended to give it a glossy feel.
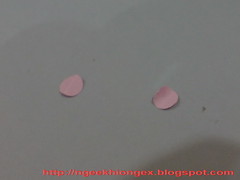
"Why not paint the sticker and punch the dots out later? That would be easier."
- You get the dots slightly bent and folded when you punch them out, it's going to ruin the paint for sure, if it's not ruined already when you slide it into the punch.

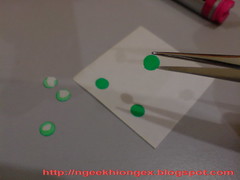
Completed stickers are transferred to the sheet from the sticker book. I made more for back-ups.
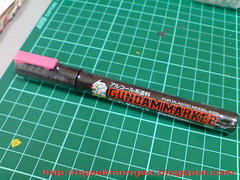
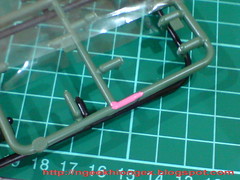
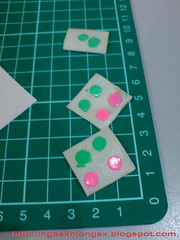

Also made a few for other BB Senshi Sangokuden models that has pink eye, like Chouryu Gelgoog, Shusou Doven Wolf and Choko Zaku III (not available for me yet).
Gundam Marker used is GM14 Fluorescent Pink.
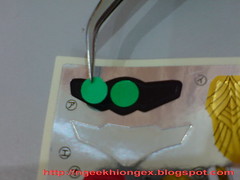
The completed sticker is a little smaller than the one on the foil sticker.
If you get to have white sticker, you can also use normal permanent markers to replace the specific Gundam Markers mentioned above.

I tried these two markers: Yosogo 70 Green and Stabilo Mark-4-all Pink on some spare stickers and the color looks good, especially the later. And the glossy finishing of these permanent markers is just right to show the eye as well. You can try them out if you don't have the two Gundam Markers shown.
Will show you the result and show you another method of making the eyes without using Gundam Markers, and discuss a bit on their limitations in the next review.


8 comments:
Halo, ngeekhiong. Eric here.
Since u have a few spare of the mono eyes painted wit the gundam marker. Try using whiter gundam marker with fine tip to create the gloss effect. Just like the box-art.
Just a suggestion. Anyway, keep up the good day. Can't wait for the next update =)
oh, i mean the keep up the good work.. sry.
just wondering how did you cut the eye so perfectly? what did you use?
just wondering... izit the punch-hole the same size if i try on my MG Zaku F2?
I'm sorry for my dumb question. I didnt notice you used puch hole.^^; I'm truly sorry.:)
>>Eric
No "watery" eye for my Shiba-I Sazabi, else he'll be cute instead of evil XD
>>Flying_Ukui
Why do you need to use this method when the mono-eye cameras for MGs are movable and is of clear part?
LOL Manchester United's Treble Feat.
I'm not into football, but since I have a friend who's a MU fan, and given that MU lost to Liverpool 4-1 recently, he might go for your throat if he'd ever read this post XD
@Ngee... my zaku's is the old 1... no clear part :*(
Post a Comment