The last round of painting and detailing on BB Senshi Sangokuden Kochu Gundam after the previous posting. ^^
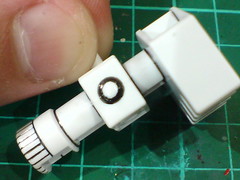
Quite a bit of additional work is planned for the sensor part of Ryuurin Gouretsukyuu (龍燐剛烈弓) to realize new details on an otherwise all-white component. ^^
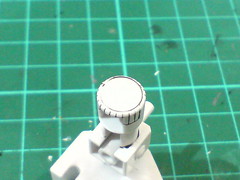
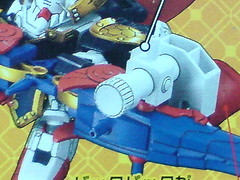
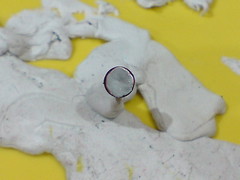
The white round spot that protrudes to the front is supposedly the main sensor of the giant crossbow I suppose, but with its blandness, it certainly doesn't look that way. ^^;
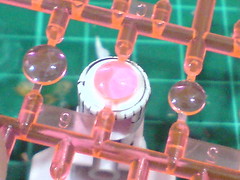
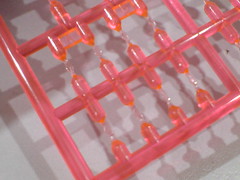
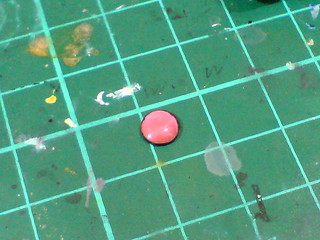
Clear pink part from H-Eyes 1 (Pink) from Wave can be used to realize the additional sensor. This is the largest piece on the runner, even though I would much prefer it to be bigger. ^^
The green type was previously used to realize the jewels on the weapons of Sonsaku Physalis Gundam and Tenshouryu Koumei Nu Gundam, as well as the targeting sensors on Master Grade Sinanju Ver. Ka's beam rifle and bazooka, so this would be the first deployment for the pink type. ^^
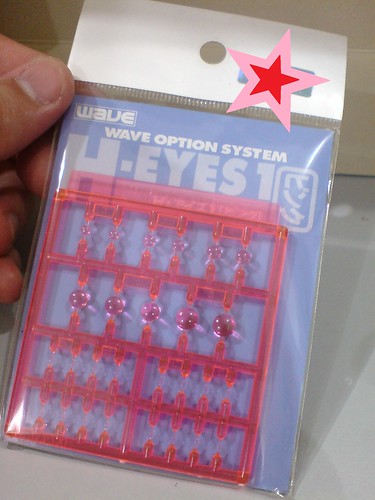
H-Eyes 1 (Pink) from Wave.
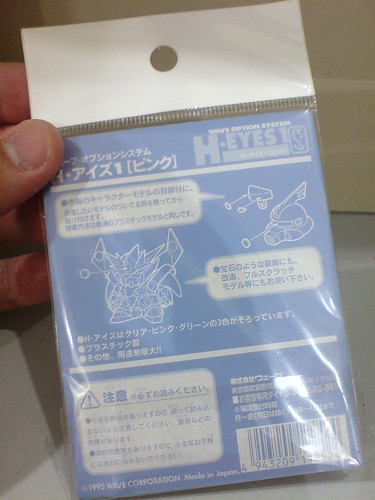
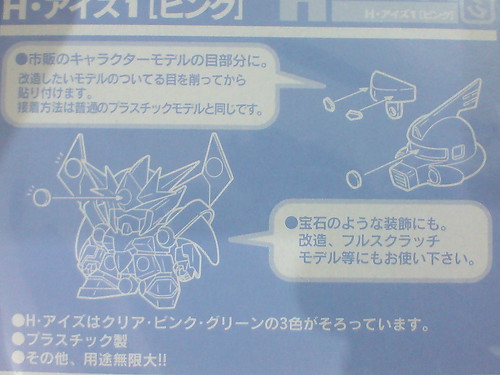
Simple instruction on the application of this option runner behind the package's backdrop.
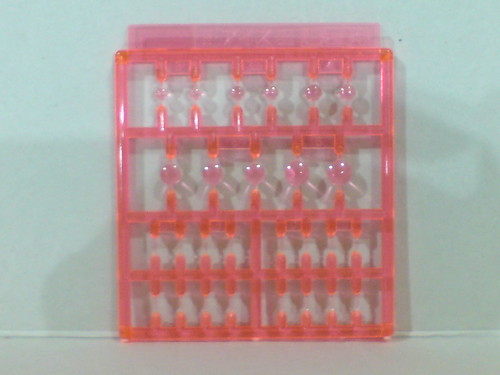

Round mono-eye pieces, and polygonal Gundam-type eyes of various sizes are included with the runner.
Besides the molded color of the entire runner, everything is exactly the same as H-Eyes 1 (Green).
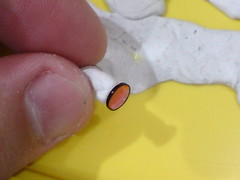
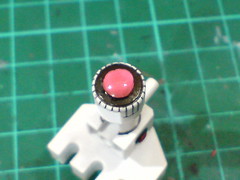
(Left) To create the "frame" of the scope, the edge of the scope is painted black using normal marker.
(Right) The underside is painted silver using Tamiya Enamel Paint X-11 Chrome Silver to give the scope a shiny base. ^^
This is how the pink scope piece looks like from the top now.
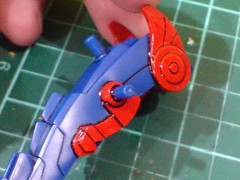
(Left) Additional jewels (?) around the weapon part are going to be painted in the same way as the jewel on the V-fin (see Part 3), since their designs are pretty much the same.
(Right) The "frame" is painted black using normal marker first.
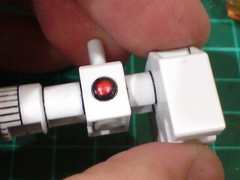
All the jewels are painted using Mr. Hobby GX202 Mr. Metallic Color GX GX Metal Red.
Back to the main sensor: the base is painted using Gaia Metallic Color No. 020 Gun Metal, before the pink scope piece is placed on top of it. Plastic cement is used to secure the connection.
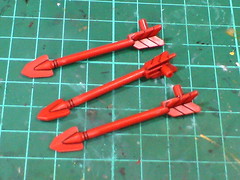
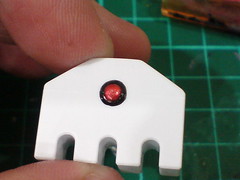
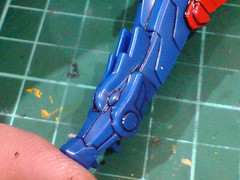
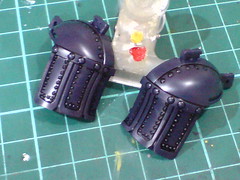
Simple panel lining for the three arrow parts, as well as the giant backpack.
A tiny jewel on top the backpack is painted with Mr. Hobby GX202 Mr. Metallic Color GX GX Metal Red.
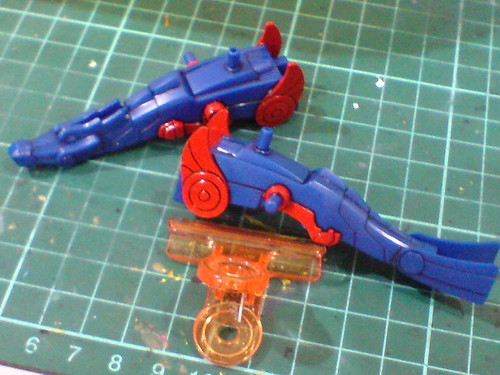
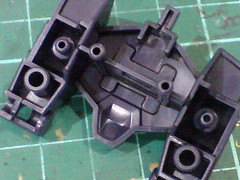
Refinement for the two giant Ryuurin Gouretsukyuu blocks painted in Part 3.
Sharpened toothpick is used to scratch off spilled red paint in some of the tight corners of the parts.
Closeups on the panel lined wings and dragon head.
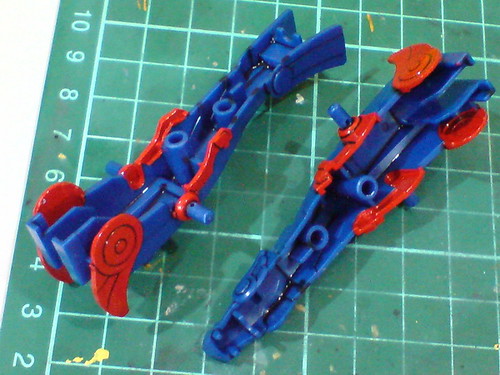
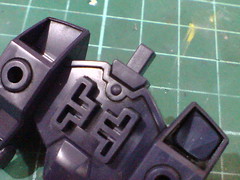
Refinement for the rear side of the two parts.
Tamiya's Panel Line Accent Color (Black) is used to highlight the details deep inside the parts.
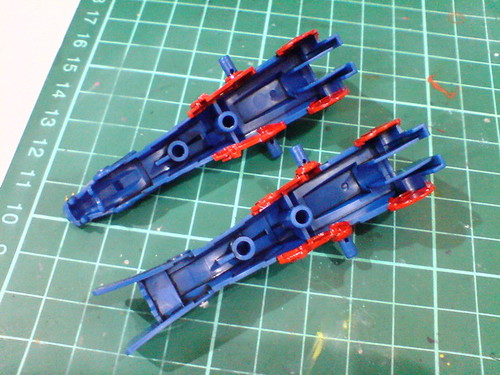
With excess panel liner paint wiped away using cotton swab soaked with enamel thinner.
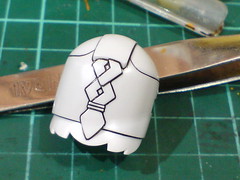
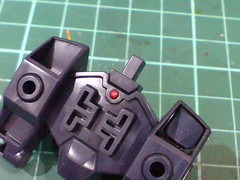
Panel lining for the helmet and head parts.
"Circling" all the tiny rivets one by one is a repetitive but rather fun process. ^^
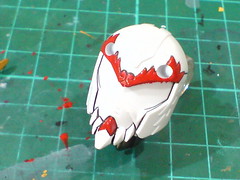
Apart from the goatee, the "eyebrows" of Kochu Gundam are also painted red (using Gaia Color No. 003 Bright Red Gloss) to give him a more striking appearance when assembled in the future.

The rest of the face details are panel lined using normal panel liner.
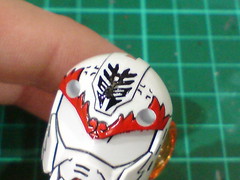
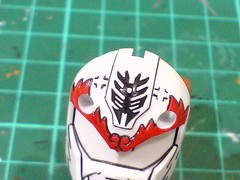
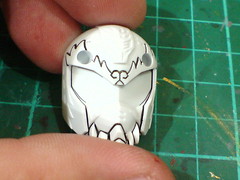
(Left) Tamiya's Panel Line Accent Color (Black) is used to outline the character's family name on the forehead.
(Right) The character can be fully seen after excess panel liner paint around the area is wiped away using cotton swab soaked with enamel thinner.
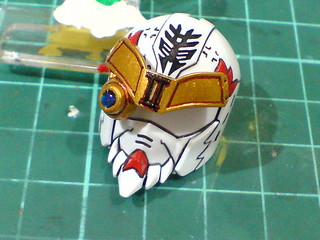
Test fitting the painted parts to see how Kochu Gundam's face would look like with the option sensor unit (see Part 3) attached to it. ^^
Done with the head, the entire work on Kochu Gundam is finished. ^^ Despite having a heftier package than most other kits from the same line as mentioned in Part 1, the overall work is not too difficult in my opinion, especially with comparison to Koshin Gyan completed in early March, and Sonshaku Physalis Gundam in November last year. The lack of curvy ornaments on its armors certainly helps with the reduction in paint work difficulty I believe. ^^
Anyway, all the parts will be kept in its box for a while before the final assembly. ^^


No comments:
Post a Comment