Mentioned in Part 4 that the pre-assembly work on the beam launcher suddenly took an unhappy turn.
As a matter of fact, it was a great disaster for me :(
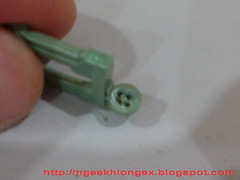
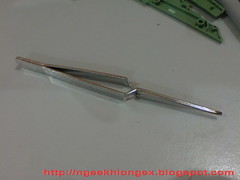
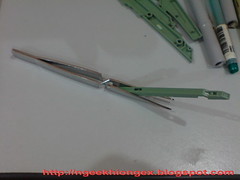
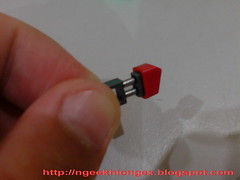
Was testing out the handle when joint broke >_<
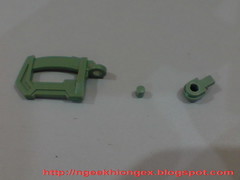
When I first tried to turn the handle, I could easily feel the joint being a bit too tight. Funnily enough, at first I thought that was a good thing, for it being such a strong joint. The next thing I know, turning the handle became so smooth all of the sudden, and next off, the whole thing just came off, just like that, as you see in the picture above.
I was a bit stunned at the moment. I've never seen this problem on other reviews before, and that worried me very much. Did I do anything wrong? Checked the manual again, and there was no mistake. The two parts are supposed to meet at the joint.
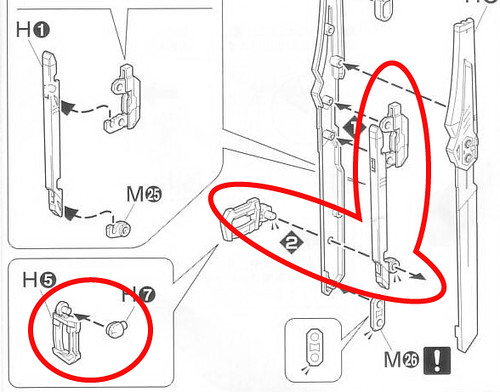
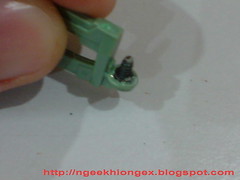
I believe the joint broke from the pressure of the linked movement with the targeting sensor inside the launcher. Supposedly, when you twist the handle downward, the joint inside the body will move and the targeting sensor will pop up. The part broken should be able to handle the task, for I seem to be the only one who suffered this problem.
It was a critical joint that was broken. Without the joint, the launcher is basically without a handle. The targeting sensor gimmick may be a bonus that can be painfully omitted in the worst case scenario, but what can you do with a launcher with no handle anyway?
Was thinking of gluing the two parts - permanently, but having the handle to stay up in midair all the time like the BB Senshi version is a total eyesore to me ^^;
Giving up? No way, else I'll give everyone permission to write my name backward. XD
On the other hand, maybe I should be feeling fortunate for having this trouble right now instead of during the final assembly. Then I'll have to detach the whole body of the launcher if I want to fix it.
This cannot, that cannot, I'll have to try my home made method to restore the joint then.
The plan is to use a single screw to replace the broken joint. Being a metal part, you can then heat up the end of the screw and burn it into the base of the original part, where the joint is broken. If the "welding" is successful, the new joint would be strong enough to be turn the handle, and move the targeting sensor as well.
But all-talk is always meaningless unless you try out your own recipe. Only then will you know if it's going to work.
Or not. ^^;


I use a screw that is smaller than the original broken part, since I already know the impact of a joint that is too strong/tight. Can't be making the same mistake twice right?
If you have assembled MG God Gundam, or Shining, Master, Spiegel, S Gundam or those earlier Perfect Grade models that use a lot of screws, the you can get tons of these screws to choose from. ^^
I forgot the spec of this black screw I'm using. I just compared each type of the screws to the broken joint to see which one is the most suitable.
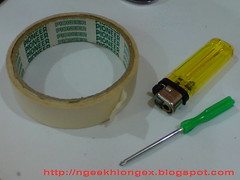
Also here to help: paper tape, lighter and a screwdriver.
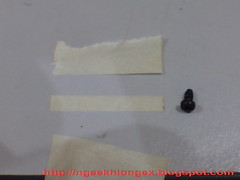

First up, measuring the length and amount of paper tape needed to fill up the space between the joint and the hole. As a rigid part, if the screw if smaller than the hole, it'll just keep falling out (D'uh). Paper tape is a good medium to tighten the space between the two parts as it could sticks onto the screw, and allows a bit of flexibility when the "new" joint is being fit into the hole as well.
After getting the right measurements, use the size to prepare a new paper tape sticker to be used later.
Next, heat up the end of the screwdriver using the lighter to poke a starting point on the base where the joint was once on. Apart from putting on a starting point, this also allows you to pave some plastic off for the screw.
After that, heat up the head of the screw and drive it right into the starting point made just now. I managed to get most of the screw's head shank into the part, so when the whole thing cools down, it's quite strong ^^
"Why not use the gas stove in the kitchen, or some other heating devices that can heat the screwdriver and the screw way faster?"
It's important not to overdo the heating part, because you might just melt the whole base of the handle. It's no BBQ party, so if you see the screw getting red hot, then you might have to prepare yourself the risk of losing the handle altogether.
Also, you would probably understand now why measuring the paper tape comes first before the heating - because measuring the screw when it hasn't being fastened onto the base is way easier than the other way round.
The final step is of course to band the screw with the new paper tape measured just now.
Testing out the new joint:

Flipping out the handle - OK. Turning it downward - OK. Staying up in midair when deployed - OK. ^^
Also, in the bottom right picture above, you can see that there's no burn mark on the bottom of the part with the screw as well. ^^
Safe - saved from having my name written backward XD
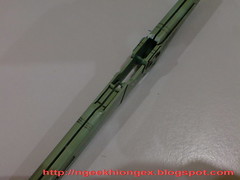
The screw is a little longer than the original joint though, resulting in a small split protruding between the two parts. If I want to remedy on this, I can just drill the hole a little deeper to accommodate the longer joint, but I'm fine with that.
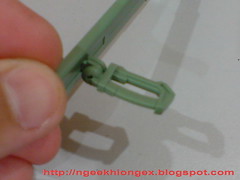
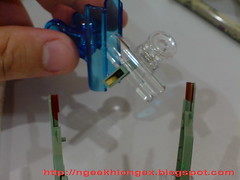
Also, a bit of introduction on a very useful tool used for the task mentioned in this posting
The reversed action tweezers
It saw action today for holding the screw to be heated up. Since it's "reversed", all you have to do is to hold the tweezers while it's doing its job. Normal plier or tweezers can do the job of course, but I'm more concerned of the moment when you accidentally drop the screw. Being small and hard to spot is one thing, a hot screw can be really dangerous too.
Finishing with the paenl-lining and painting of other parts of the launcher:
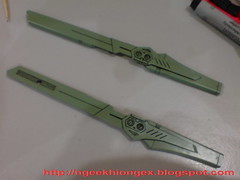
Painted the two pipes at the end of the launcher in silver.
Couldn't resist the temptation of having silver for all tube or pipe like design on this MG XD
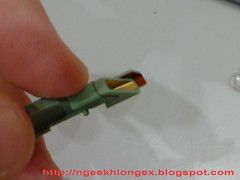
Two colors used for the nozzle of the launcher - gold for the inner nozzle and red for the exterior.)
Just to complicate the launcher a little bit more so that it would look a little different from the main body.


13 comments:
mine was broken when i was posting it..
I knew of the problem, so instead of turning the handle, i held at the joint and turned it instead ^^
but no big deal, i seldom use the launcher anyway. It's just too puny :p
watch out at his both knee joint..
when u put it together,it will become very stiff and hard to rotate.mine just broke when i try to bent the knee..
i means the parts L12, L15 and K19.
(refer to your destiny manual)
maybe this just happen only to me,but i think i should remind you.
The same part broke on my MG Destiny =/
Not much of a big deal because I prefer to display him with the sword.
LOL the same thing happen to me I didn't bother fixing it I figured nobody would see it
Looks like I better be careful when I finally decide to buy the Destiny in the future. Sounds like some annoying problems there. >_>
I should remember that screw trick, since I got so many from my G Gundam. XD
mine was broken too. both MG n HG cear version.. >< seems like a common problem. Didnt bother much about it. Used superglue to put it there permanently..
Mine was broken too! :( I broke it after I put them together, and the 'male part' stucked inside! :(
hi. mine was broken too zzz
I think i'll try to loosen up the joint for my destiny.
Wow so many people had the same problem o_o. This is the first time I've heard of such thing for this MG, but luckily your homemade method is very nifty and great there~ ^^
Looking at all the comments I have to agree that the design for the launcher handle isn't that great. Mine broke also.
Post a Comment