Was hoping that things would be a little easy for me after the first round of painting on the display base, but the first move sent everything down the drain. ^^;

Initially, I wasn't going to use a normal whiteboard marker (green) to paint the interior of the clear canopy. I was actually opting to use a green highlighter instead, just like those clear parts for the GN Drive and GN Condensers of my Exias. Somehow somewhere along the wire connecting my brain with my hand broke and it reached for a whiteboard marker instead.
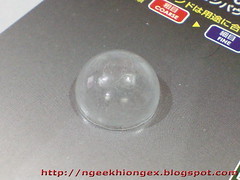
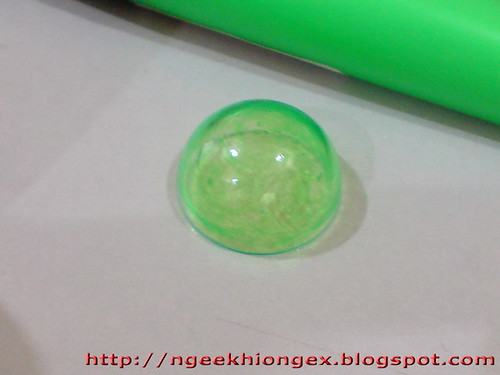
The result was a complete disaster, as you can see in the image above, the ink from the marker blotted at different spots and the canopy now looks like some ridiculous art work from my kindergarden days. ^^; I wasn't panic at that moment, since it happens all the time anyway. Painted some parts, the paint doesn't work, rub the it off and try again. That has been my way all along.
The panic only kicked in when I found that all the regular tools I used to clean off the paint useless. Alcohol, water, correction fluid remover or the usually very dependable Yoko-Yoko raised their white flags against the stubborn paint, which I shall now call stain ^^;
For a moment there, I actually felt amazed with just how resolute the stain decided to stay inside the canopy. XD It's really amazing, I've never see how hopeless all those mentioned tools are against this stain. Nothing was able to move the stain at all, as if it had fused with the clear part XD
And of course, the regretful thought of, "Told you to use a green highlighter, you idiot!" just kept on lashing my mind all that while. ^^; Being yelled at by yourself was such a dreadful experience. ^^;
In the end, I brought the part to the kitchen and cleaned it using a cellulose sponge and cleaning detergent. Sure enough, the rough surface of the cellulose sponge is superior to the stain and the paint came off, but it was a bitter victory, as the clear part is no longer clear. ^^;
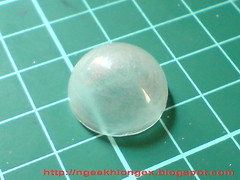
It's now completed blurred with all the scratches from the treatment with the cellulose sponge. ^^;
Maybe I should be feeling lucky at this point that the whole thing didn't break from the rough cleaning process just now. ^^;
Well, the task now has changed from cleaning the stain to clearing the scratch marks, and I have (about) the right tool for this.


Mr. Compound from Mr. Hobby. This one is Super Fine 8000. 25ml, the price is about RM40.
Now, the thing I learned about Mr. Compound is that its purpose is almost similar to paper file, but it's used for clear parts, and it's always used on the surface, not for the interior. ^^; The effect is like glossy polish.
Another thing I know, is that you should start with a smaller number (600 - coarse), then bigger (3000 - fine), and finally this largest 8000, just like how you sand a Gunpla part.
Here's an example of how magical compound is in turning clear part to almost crystal-like demonstrated by Master Nobuyoshi Ochi (越智信善). He used a different brand though. It's this video that fascinated me about compound actually.
Video clip is from Youtube. Follow this link to the website if you can't see anything.
Anyway, I'm not ambitious to try anything like that. I'm just a desperate person trying to get rid of those scratch marks XD
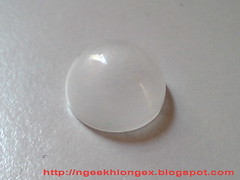
After about 8 or 9 rounds of rubbing using Mr. Compound, the result:

Left (before) and right (after).
Some nasty scratch marks are still clearly visible, but the whole part isn't that blurry anymore. ^^
After another few round of polishing, I decided to call it done (before running into the risk of breaking it ^^;) and paint it.
And this time, green highlighter it is! ^^
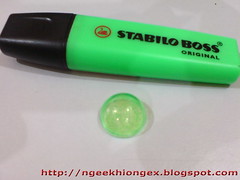
Way better now ...
... for sure. ^^;

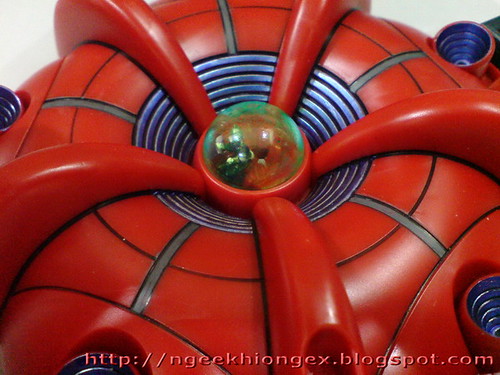
Great to see that Iron Mask is visible under the canopy. ^^
Oops, seems like I managed to get done with one part only again this round ^^; Will get the entire base done in the next review.
Hopefully ^^;


4 comments:
so if i want to acheive marble effect http://hk.myblog.yahoo.com/ambroseyin/article?mid=12269 i have to use the compound which is like the one u used for the clear part???
Dipping the clear piece in something like Future Floor wax (acrylic floor finish) will also get rid of small scratches.
I don't know man. I really like the marbling effect of the Rafflesia cockpit. Kind of gives a sense of realism to it.
The surface do add a certain level of texture, like Cirrus said, and make it more realistic. Maybe it's like "weathering" a clear part?
Post a Comment