Starting to work on HG Build Custom GP Base after the introduction in the previous posting, with the focus being the information card for the base's display screen. ^^
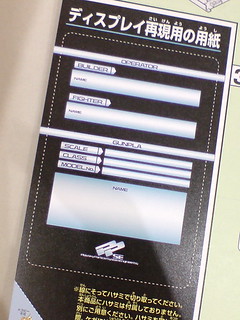
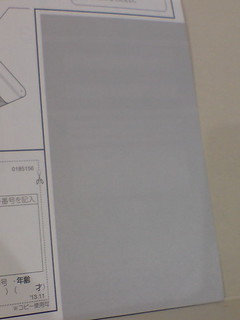
The template for the information card included with the kit, ...

... versus the GP Base display screen as seen in "Gundam Build Fighters". ^^;
As mentioned in the previous posting, the information card template included inside the instruction manual is only useful if you're alright with having only a blank screen for all the kits to be displayed with the GP Base, and you are willing to cut out that portion of the manual in the first place. Personally, I prefer to have different screens that can represent the Gunplas on display accurately, not just in terms of the information of the kits, but with display elements as seen in the anime as well. ^^
For that matter, handwriting on the information card cut out from the instruction manual was never one of the options when I was pondering on what to do with this kit. ^^;
Scanning the card and editing it using an image editing software such as Adobe Photoshop seems like the most direct way to attaining the goal of having different display screens, but there are challenges in doing so, mainly finding the right font face and colors to get the most show-accurate outcome.
Luckily for me, all that work has already been done by the generous folks over at Gundam Toy Shop. Not only do they have the softcopy version of the information card ready to be downloaded, it's all set up to be edited using Adobe Photoshop and comes in two versions: design from the instruction manual and the "power-up"-type as seen in the anime. On top of that, they have come up with the True Type font file needed for the editing of the template, which would be extremely useful for those who wish to create additional cards in the future. ^^ There's even a tutorial file for folks to follow in using the template and font file as well. ^^
All the files mentioned above can be downloaded through this link on Gundam Toy Shop. I would like to take this opportunity to thank the designer over at the website for the excellent work and generosity in sharing the files for others to customize their GP Base. ^^
For the first time in my Gunpla-ing experience, Photoshop is involved directly with the detailing of a particular kit. ^^ That's something new in 2016. ^^

How the template is being set up in Photoshop.
The file works fine with my old CS2 version. ^^;

The first step I took was arranging and grouping the different text layers based on the two different cards. As seen in the image above, I named the groups 'Left Panel' and 'Right Panel' for simplicity's sake.
Trust me, the grouping would make some of the subsequent work a lot easier. ^^
The template itself is already very well done in terms of the font arrangement, color and effect. You can use the file to create all the information cards for different kits as you desire. ^^
However, some additional editing is required to replicate the details of the display screen from the anime. As seen in the top-most screenshot, some of the text need to be enlarged and stretched to fill up their designated spaces, and a very familiar-looking logo needs to be added as well: ^^
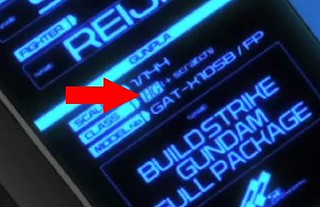
The blink-and-you-miss-it High Grade Gunpla series' emblem is part of the display in the 'class' row.
With Photoshop, getting said emblem into the template and format it according to the design style is quite easy.

Using an image file of said emblem, just the two characters are going to be selected while everything around them will be removed.


(Left) The black background screen color of the information card is applied to the two characters as their color.
(Right) A rectangular box with the same color as the information card's text is added as the new background.
The image is cropped as close to the characters as possible and it's ready to be added to the template. ^^

Drop shadow layer effect is added to the emblem following the style of the other text layers.
All the editing is concentrated on the 'right panel' first to get a singular, consistent text appearance for the content. ^^

A closeup on the HG emblem. ^^

The entire 'right panel' layer group is duplicated to give the details a more obvious glowy effect.
Done with the display screen for Build Strike Gundam Full Package. ^^

The entire 'right panel' layer group is duplicated again, but shifted leftward to populate the instruction manual-type information card, but as you can see, the light-colored, glowy text display is not appropriate for the background.

The font color is changed to that used for the labels on that card, and all the layer effects are turned off.
For the HG emblem, the rectangular background is removed and the character color is changed accordingly.

Done for both cards. ^^

Did one for Build Strike Gundam as well. ^^
Besides getting rid of some part of the text, the font size and positioning of the kit name have been adjusted as well.

Printed the information cards. ^^

Side-by-side comparison with the card in the instruction manual to make sure that the size is right.
Even though the current print result looks fine, the normal colors on the cards may not stand out well when placed beneath the opaque plate.

For a more "flamboyant" appearance, the cards are reprinted on silver sticker sheet. ^^

Comparison between the card printed on a normal paper and that on a silver sticker sheet.

Black paper is used to form the rear side of the card.

The work just changed from image editing to primary school artwork. XD

Done for the cards. ^^

Also completed are the display screens for Fellini's Gundam Fenice Rinascita, which would be useful to compliment said kit that I bought in December 2014, and a set of blank cards to be used in standby mode. ^^
I also did the cards for several other kits that I will not name at the moment to keep the element of surprise. ^^


Test fitting the completed card with the GP Base to see how the display screen would turn out when assembled. ^^
Shiny. ^^

A few parts of GP Base itself are detailed using Gundam Marker GM02 Gray with fine tip for panel lining and Tamiya's Panel Line Accent Color (Gray).
With that, the work on HG Build Custom GP Base is done. ^^ Unlike HG 1/144 Build Strike Gundam Full Package, and pretty much all my Gunpla kits, very little of the detailing work actually involved parts from the kit itself. Instead, a significant portion of it was done using a computer. ^^ In the end, even though the base may appear to be merely a special accessory to compliment kits from "Gundam Build Fighters", the unique nature of the detailing process makes it a memorable experience. ^^
As usual, there'll be a bit of offset time between now and when I revisit all the parts again for the final assembly. ^^ For this special Gunpla base, it will only be reviewed after I complete HG 1/144 Build Strike Gundam Full Package but I don't have any plan for that at the moment. ^^ Instead, I'm planning to move on to do the first action figure review on this blog for 2016. ^^


3 comments:
Wow getting Hardcore with Photoshop bro. LOL
Thanks a lot for this.
I had just scanned my son's instructions in to make this before I found your page.
This will save a tonne of effort!
Ah the files are no longer available!
Is there any chance you still have them?
Thanks!
Post a Comment