Dragging my lazy butts back to continue the work on MG Shin Musha Gundam after the previous part last Wednesday. ^^

Focusing on the 4 sets of thrusters and backpack now.

Hand painted the interior of the thrusters with Mr. Color No. 158 Super Italian Red Gloss (debuted in the work on HGM 1/550 Dendrobium).

Painted the edges of the thrusters' body in gold using Gundam Marker Gold.
The connectors can be conveniently held using paper clips, so I suppose I could say that the work was pretty simple despite the parts being pretty small. ^^

Panel lined the line details inside the thruster after the paint has dried.


(Pictures taken with flash on) A bit of luck is needed when panel lining the details since they are quite hard to see ^^;

Panel lined the exterior line details as well.
Very fast as compared to the ones inside the nozzle ^^


Done for all 4 thrusters.


Panel lined the painted golden portion on the body of the thrusters.
Was thinking of keeping the tip in black to show how the interior of the thrusters could be hollow, but it felt too normal to me. ^^;

Painted the tips gold in the end ...


... to get a golden interior of the nozzle. ^^
Seems more extravagant to me, a feeling this Samurai Gundam needs. ^^


Golden ring and line details on the thrusters.
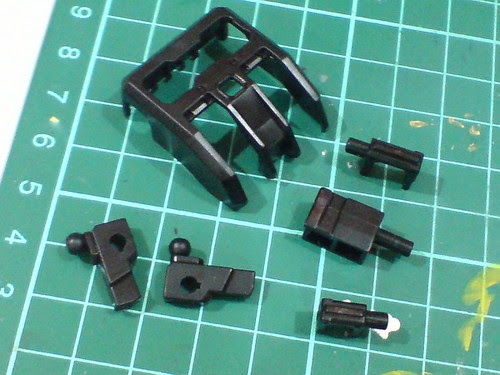
Simple panel lining for the other backpack parts.


The two screw-like design on the backpack's frame part should be in white, according to the color scheme shown on the manual.

Painted using Gundam Marker White.


Panel lined and painted the black interior of the white parts.


Two little pipes on the side of the backpack are painted in gold for extra details. ^^

A look at how the outcome of painted parts would turn out.
3 colors now - black, white and gray, and then another 2 will come on - red and gold from the thrusters, so the completed backpack will have 5 colors in total. ^^
E-ku-su-to-ra-ba-gan-to desu! XD


The splits between the vents would allow some details from the inside to be exposed, but as shown in the picture on the left, the details are very minimal. ^^;


Easy solution - painted gold for the vent areas that are supposed to be exposed. ^^


Painted the two little tabs on the back parts in gold as well to make them look like power connectors.


Simple panel lining for the other body parts.


Not-so simple panel lining for the body's inner frame parts. ^^;
The work is totally identical to that done on MG Gundam RX-78-2 Ver. OYW, since the two parts are inherited from that kit, but I can't remember how I felt about them from that kit already. ^^

The body part expresses its bewilderment at my love for bling-bling details on Gunplas XD
Totally lost control of the amount of golden details added onto this kit just in this posting alone, but it feels really good. ^^


No comments:
Post a Comment