Like the ones for Action Base 2, HGUC Zaku III, MG S Gundam and MG Zaku II, it pains me to write a review with the first word in the title being "Fixing", because that means I broke one of my model kits again. T_T
About two weeks ago, when I was opening the glass window of my display cabinet, the old Gundam RX-78-2 from HGUC Operation V set performed a near Olympic-class platform dive straight onto the floor. He won no medal for that stunt except quite a few broken parts. T_T
On separate thought, maybe he committed suicide over the stuffy environment he had been enduring over the years. ^^; That would be entirely my fault then. ^^;
Like hitting a jackpot of bad luck, some the most important parts on HGUC Gundam RX-78-2 are broken after the plummet:
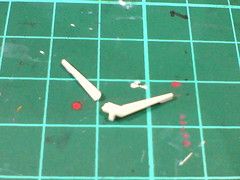
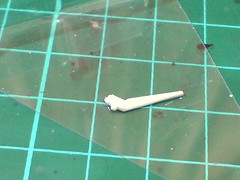
Broken V-fin.
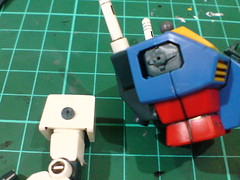
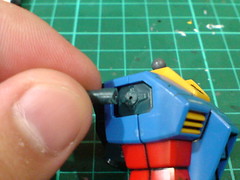
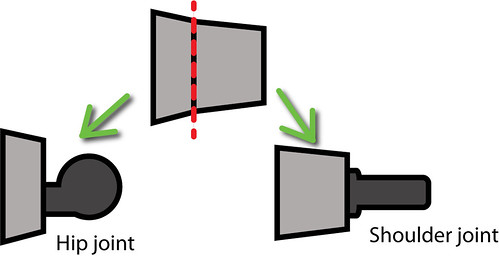
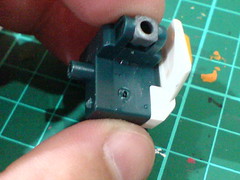
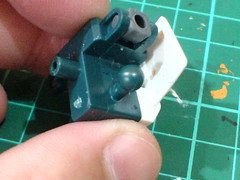
(Left) Broken shoulder joint,
(Right) Broken hip hip.
Any single broken piece shown above deserves one or two postings dedicated to the effort of repairing it, but I'm "fortunate" to get all of them in one shot. ^^;
Fixing HGUC kits is hard enough due to their smaller overall size (the V-fin is a prime example), but fixing the joints is even harder, because the repaired parts must still be able to support articulation, unless that is to be sacrificed for the sake of piecing the whole together again into a fixed model, which in my opinion, totally defeats the purpose of the entire repair - the model can't move without the broken parts, it can't move when the parts are reassembled onto it as well.
Getting rid of the quick solution of cementing everything back onto the kit to get the "appearance" of a repaired model was the first step in the whole process really. ^^ Now that I'm not thinking about taking the shortcut to get things done, I can start planning some serious steps to fix the joints.
Before turning my attention to the broken joints, the V-fin will be treated first.
Repairing broken V-fin is a very interesting challenge. Its small size pretty much renders the usage of a metal rod (however small one you can find) to form its makeshift "connector" impossible, especially for a Gundam-type V-fin. ^^; You can recast a substitute V-fin by using that part on another Gundam, but you'll need special tools and materials for that. On top of everything, another critical factor to succeed with this method is the ability to find another V-fin that is suitable as Gundam RX-78-2's replacement. ^^; It would be mighty easy to have another model of the same type to borrow the V-fin, but one could never be certain if the size and design are compatible with this kit. ^^;
Anyway, the point is, for a broken V-fin, recasting a new one seems to involve an awful lot of work and various other parts, which I don't have anyway. ^^;
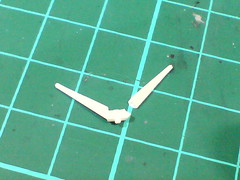
The simplest solution, just cement the broken parts, like this:

The problem is, how should the part be handled while waiting for the cement to dry and to become firm? ^^;
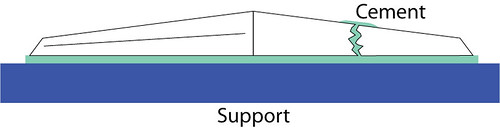
Holding the part using a tool is possible, but the pressure will be on the cement to hold the broken piece in place, which usually won't work because the cement is forced to carry the duty of holding the broken parts together prematurely. I imagine this is what would happen:

Fixing broken cemented parts is a different story since another layer of cement would definitely expose the previous fail attempt on the part itself, making the nasty crack easy to spot. ^^;
Having a flat surface for the V-fin to rest upon while waiting for the cement to dry is the way I'm aiming for here:
Then again, the problem is, what kind of surface to put the parts on that won't "disturb" the cement? ^^; I get to answer that question for the rescue on this HGUC Gundam RX-78-2. ^^
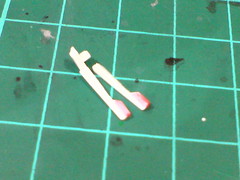
In order for the V-fin to rest properly on the surface, the "toothbrush" bits at the edge of the fins (left image) as well as the tab to attach the part onto the helmet must be cropped off first.
The crack on the fin itself is not treated at all.
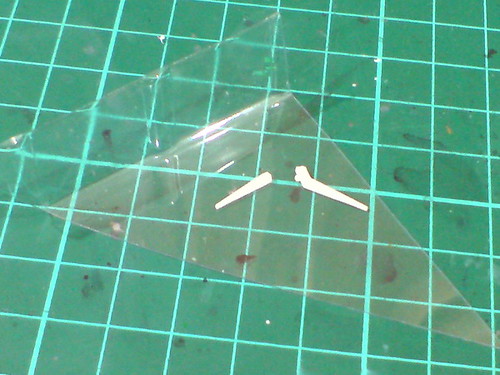
The material to be used as the V-fin's placeholder: clear plastic cover from tray that holds action figure. ^^
I frequently cleared out the boxes of my action figure packages, so these covers become additional tools for some of my work. ^^
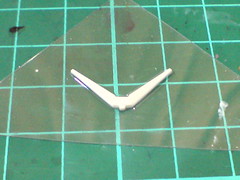
To set the parts in place firmly, a layer of cement for plastic kit is applied onto the cover first, followed by the part's placement onto the cement using a set of tweezers.
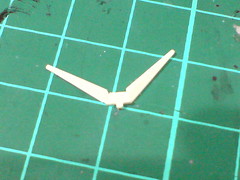
The broken V-fin piece is set last so that I can adjust the piece to get the proper angle of display for the parts, in other word, reconstructing the whole piece. ^^
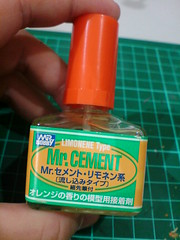
The cement I used is Mr. Cement Limonene Type from Mr. Hobby.

The good thing about having a layer of cement behind the V-fin is the "supporting" layer to hold the broken pieces stronger than just having cement between the cracks. ^^
Wouldn't the cement sticks to the plastic cover (the surface) as well? No it won't. ^^ I experimented using other PS parts and cement on the plastic cover before proceeding with this work and that the conclusion I got. ^^ So the V-fin gets to rest properly while I work on the other two broken parts. ^^
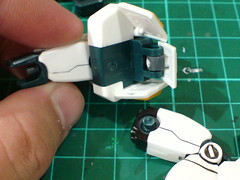
Other parts separable from the joints are removed first to give more clearance to the repair.
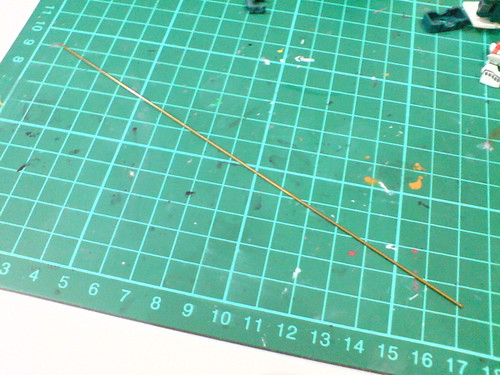
Toothpick used on MG Zaku II is too big; staple pin used on HGUC Zaku III is too puny. A different material is needed as the connector: brass pipe of 1.0mm outer diameter. ^^
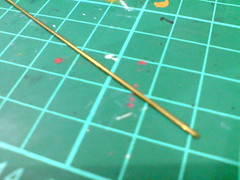
The rod was initially intended for other hobby-related projects, but it'll be very handy in the rescue mission for this kit. ^^

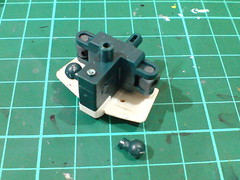
Modelling Support Goods (M.S.G.) Pla Unit P-113 Vernier Nozzle III previously used on my HGUC Sazabi's Funnel units will be useful to this work as well. ^^
Only one nozzle part from the runner is needed.
This smallest "cup-type" unit (4.0mm wide in terms of nozzle diameter, 4.0mm tall) will serve well for this task. ^^
Some work will be needed before the nozzle unit can actually be used. ^^;
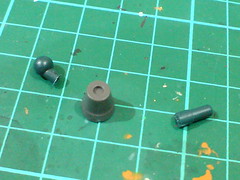
The intention is to use the inner and outer rings of the nozzle unit as permanent supporting bases for the two joints, since connecting the broken pieces to the main body using just brass pipe is not strong enough. ^^

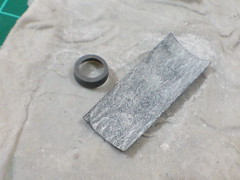
The two targeted segments are separated using Tamiya Handy Craft Saw, which was previously used to get rid of some unwanted plastic part inside the shoulder shield of 1/100 scale Zaku Warrior with Blaze Wizard and Gunner Wizard packs. ^^
My staple and a layer of double-sided tape also assisted in the entire work - whatever I can find on my desktop that can help will be recruited. ^^
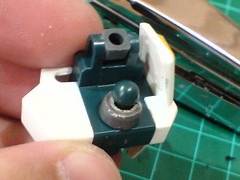
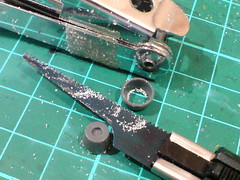
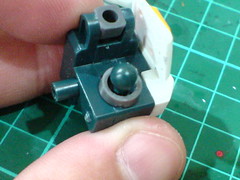
Testing the outer ring of the nozzle as the hip joint's supporting base.
Seeing how limited the space is around the ball-type joint when the nozzle ring is attached, the part is sanded rigorously using metal file and then paper file to make it shorter.
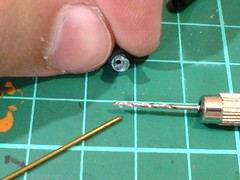
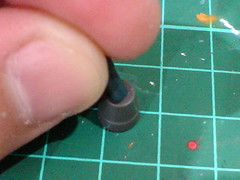
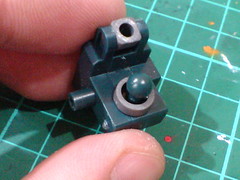
(Left) Moving on to the broken hip joint itself: a hole is made on the peg using pin vise with 1.0mm drill bit.
(Right) An estimate of how long the brass pipe needs to be inside the hip is taken.
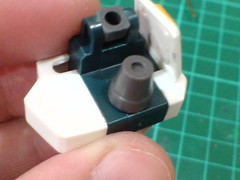
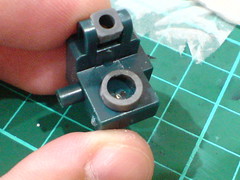
(Left) A hole is made on the hip using pin vise with 1.0mm drill bit as well.
(Right) Test fitting the parts to see if the hip joint's position matches the hip accurately.
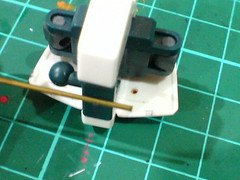
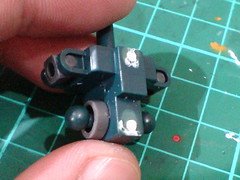
Another test to see if the nozzle ring can fit through the ball-type joint to sit on the hip block correctly. ^^
All green for the different parts, the nozzle ring is attached to the hip block using cement for plastic kit. The hip joint with the brass pipe as its connector comes on later.
To have more room for the entire work, the rear skirt armor is ripped off from the back of the waist it was firmly connected to via cement when I assembled the kit many years ago. Those white broken connector pegs look pretty bad, but they will be hidden using cement once I reassembled everything later on. ^^
Phase 1 of the work on the hip joint is over, fixing the shoulder joint will be the focus in the next posting.


No comments:
Post a Comment